Creating a new page
This help page goes through how you can create a new page, how to create content for it, as well as how to edit, copy, or delete the page. Blocks are used on the Help pages for creating content and for visual presentation. You can use simple title and paragraph blocks or pre-tailored, more visual blocks.
Creating a new page and settings
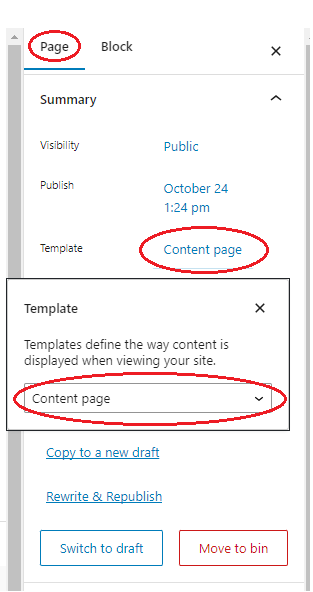
Add a new page by selecting Pages -> Add New Page from the left side of the control view. (Articles are not used!) The Content Page template are used as a default, so there is no need to select a template separately. If you are creating a front page for the site, you can change the page template used from the right-hand column. Select the Page tab and switch to the Jamk Front Page from the Page Template section. The site has two page templates available: Content Page (narrow page template) and Jamk Front Page (full-width page template). The Jamk Front Page template is used only on the front pages of sites.
You can also create a duplicate by opening the edit view of the page you want to copy and clicking the Copy to New Draft or Duplicate Post button at the top. When you have duplicated a page, name it differently and check the page path identifier from the permalink section on the right column.
Default site template is Content Page. Jamk Front Page -template is used only on Front pages of each sites!
Adding blocks
You can add blocks by clicking the “plus” icon from the right-top corner. or hovering the cursor between blocks. After clicking, select the block you want, which will appear at the end of the editor view. You can search for a block by name Note! The available blocks vary depending on the page template used.
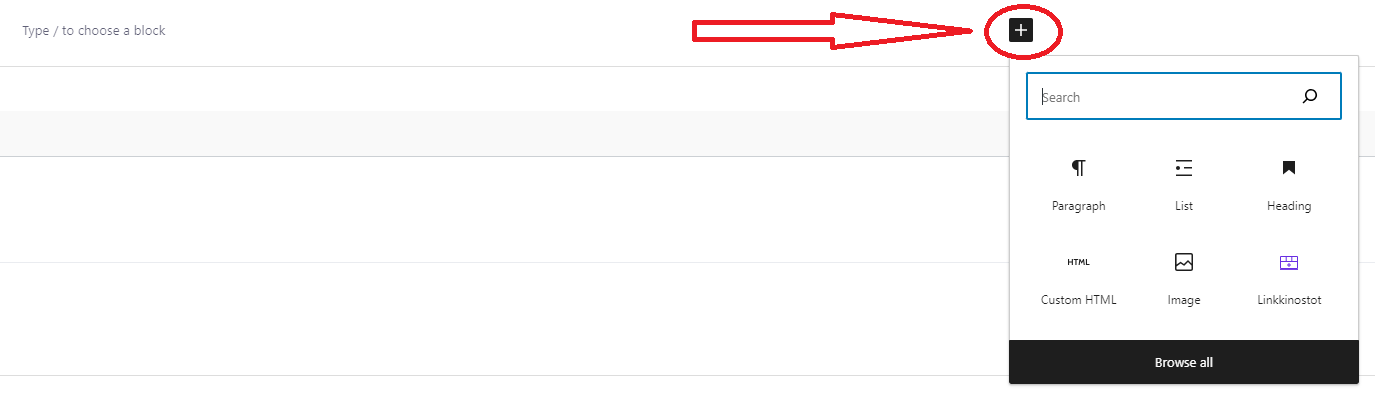
You can get familiar with the blocks available from Content Page Blocks and Full-width Page Blocks
The new element always drops to the last in the content. You can raise it by clicking the element active and then up arrow on the page. You can also drag the element by pressing the six dots on the left side of the arrows.

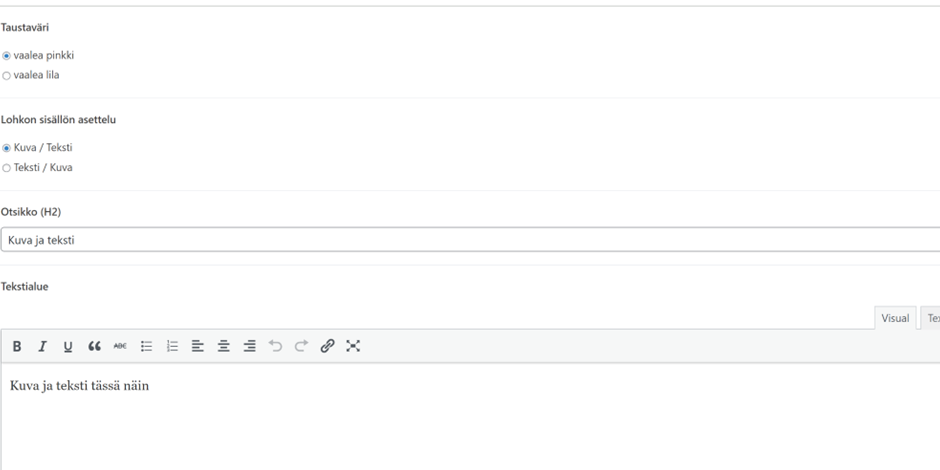
Use headings in hierarchical order. The main heading of the page (on a black background) is an H1-level heading. Therefore, use H2-level and smaller headings on the page itself. You can add regular content text with the ‘Paragraph’ block and get a visual appearance by using pre-tailored blocks. You can also copy text content from an old site. However, note that in the regular paste function (CTRL+V), the text definitions and styles (such as headings, boldings, links, etc.) are preserved. If you want to paste the copied text as plain text, use the CTRL+SHIFT+V key combination. Always remember to save your changes after editing with the ‘Update’ or ‘Save Draft’ buttons in the upper right corner
Consider what kind of content you are creating and what element best suits presenting the content.
Adding links
You can add a link to a page using the ‘Add link’ button. If the target page is on the same site, it is advisable to use relative links. This way, the link will automatically update if that page is moved or renamed. You can add a relative link by entering the page name in the search field and selecting the desired target page.

If the link destination is to another site, then use absolute addresses. Write and copy/paste the entire target address into the designated box. Do not use the ‘Open in a new tab’ option; instead, let the end-user decide whether to open the page in a new tab or no
Articles and announcements
News (Articles and annoucments) are published on Elmo-Intra are are fetch as a RSS-feed into Help front page automatically. Due to usage rights, any possible image in the news will not be transferred along with the feed to Help-site.
Save as a draft and publishing
When you are creating a new page, it’s a good idea to save a draft of the page at regular intervals. This can be done with the ‘Save Draft’ button in the upper right corner. You can access the Preview view with the ‘View Page’ button.
When the page is ready, it’s time to publish it. Click the ‘Publish’ button and then click ‘Publish’ again. After publication, the page is publicly available to everyone. It is always possible to edit the page or revert it back to draft status.
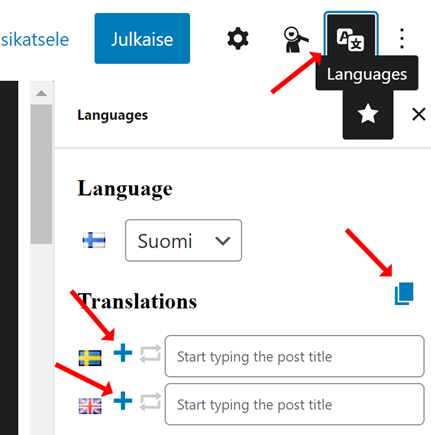
Click the “file” icon to activate it (blue) and then add the language version from the plus sign. This way you get a copy of the elements, and you only need to change the text content.
At the end of the edit view, at the bottom of the page, you will also find edit fields for the right side column lifts. You can set an automatic content service request lift and/or manually entered background color lifts (fields to be entered are title, ingress and link)
Sitemap and navigation
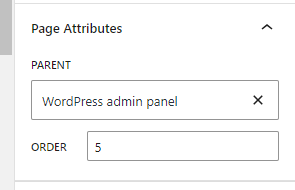
Scroll down the right column and select the top page for the page from the “Page Attributes” section. If the page you created is the top level, you don’t need to make a selection.
The sitemap and navigation is automatically built based on how main pages and subpages are set for the pages. You set the top page from the bottom of the right column in the Page Attributes section. The order describes in what structural order the pages come. The larger the number, the lower the page is located in the menu and vice versa.
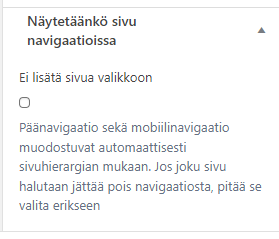
Note! If a specific page should not appear in the navigation, this must be selected from the site settings.
The setting can be found in the editing view, Page -> Näytetäänkö sivu navigaatiossa (Show page in navigation).
Ei lisätä sivua valikkoon = Page is not added to navigation
Link the page to the language version by clicking on the Languages section in the upper right corner and then typing the page name in the language version fields.