To get started with Zoom
1. Student and teacher: Download and install the Zoom app on your computer.
- Download and install the Zoom app on your laptop from the Microsoft store (for Windows) or Zoom Download Center.
- Follow the instructions on your screen.
2. Student and teacher: Find the SSO button on the login view and sign in to Zoom with your Jamk credentials.
- Enter Jamk in the Company Domain field and click Continue.
- Log in with your Jamk credentials.
- Zoom may send a confirmation message to your Jamk email. Click the link in the email to confirm your login.
- The app opens, and you can check that you have actually signed in with your Jamk credentials by clicking on the profile icon in the top right-hand corner.
3. Student and teacher: Add a profile picture to Zoom.
- Go to https://zoom.jamk.fi
- Click Sign in and use your Jamk credentials.
- Select Profile in the left-hand side navigation.
- Add a profile picture to your Zoom profile by clicking on the profile picture icon. The profile picture is visible in Zoom meetings when your camera is off. Having a profile picture makes networking easier. Choose a picture that makes it easy to identify you and one that is professionally appropriate when you represent Jamk in Zoom meetings with members from other organizations.
4. Teacher: Customize your Personal Meeting ID link.
- Personal Meeting ID: If you want to use your own personal Zoom address whenever you start a new Zoom meeting from the Zoom app or by clicking New Meeting on the Zoom website, click Edit and choose Use this ID for instant meetings. After this, for example, if you add a Zoom link to an Outlook calendar invitation, your personal address link will automatically be used.
- Personal link: Click Customize and replace the numeric sequence at the end of your personal Zoom link with your name (https://jamk.zoom.us/my/yourname). You can also modify the name with your course or event name if necessary.
- If you want to use your personal link for online meetings in your courses, copy the link from your profile page and add it to the Welcome tab of your Moodle course so that your students will find it easily. Include a password if you use one, or mention if there is a waiting room for the meeting.
- When it is time to start the Zoom meeting with students, click the link in Moodle. When you use the same link as your students, you make sure that the link works and the students can access the meeting without difficulties.
5. Teacher: Check Zoom settings on the website.
Select Settings in the left-hand side navigation. Make sure that
- Join before host is not active.
- Require a password is active or not active depending on your preference for using passwords in meetings.
- Breakout rooms is active.
- Waiting room is active or not active depending on your preference for using a waiting room.
- Explore other settings if needed. For example, you can customize the text visible in the waiting room.
6. Teacher: Check Zoom settings in the Zoom desktop app.
- Launch the Zoom app on your computer. if not already logged in, use SSO to log in.
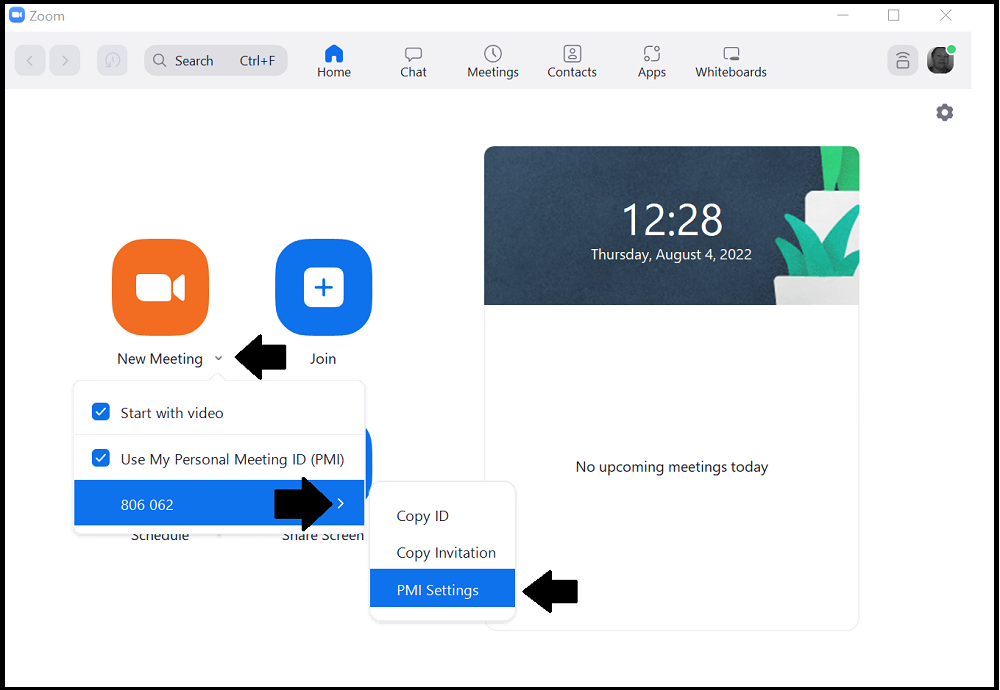
- Check Personal Meeting ID settings. Ensure that features like password are set according to your preferences. Access settings by clicking the small arrow under the New Meeting button. Hover your mouse over the Personal Meeting ID number, and select PMI Settings.