Browser cache issues
Logging in to Jamk services uses the global Microsoft sign‑in portal. Since most users have, in addition to their Jamk Microsoft account, other Microsoft accounts such as a personal, workplace, or another educational institution’s account, the login may automatically proceed with the wrong credentials in Microsoft’s sign‑in portal, or conflicting user information may cause an error during sign‑in.
These issues can be worked around by using the browser’s private window for logging in. This feature is usually found in the menu at the top‑right corner of the browser. The name of the feature varies slightly depending on the browser:
- Microsoft Edge: New InPrivate window
- Google Chrome: New Incognito window
- Mozilla Firefox: New Private window
- Safari: New Private window (found in the File menu)
If using a private window does not resolve the issue, or you want to permanently fix the problem without always using a private window, clearing the browser cache is a common way to fix browser cache issues and login credential conflicts. Below are instructions for clearing the browser cache for each browser.
Clearing the browser cache
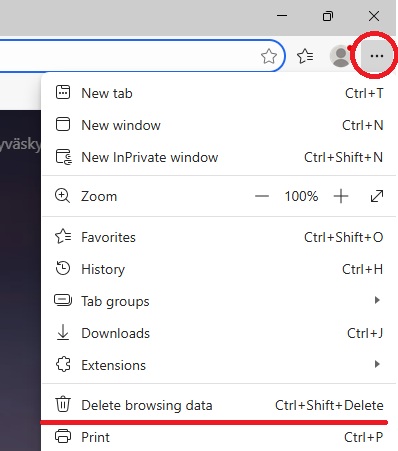
Open Edge’s main menu by selecting the three dots in the upper‑right corner and choose “Clear browsing data.”
If necessary, adjust the time range for the data you want to clear. The recommended option is to clear all history. If you have important saved sign‑in or form data in the browser, you do not necessarily need to remove those.
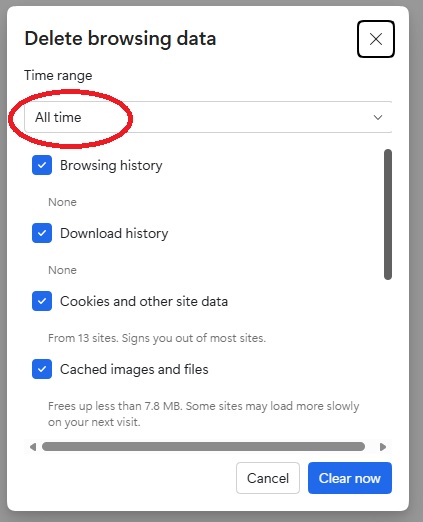
Finally, select “Clear now.”
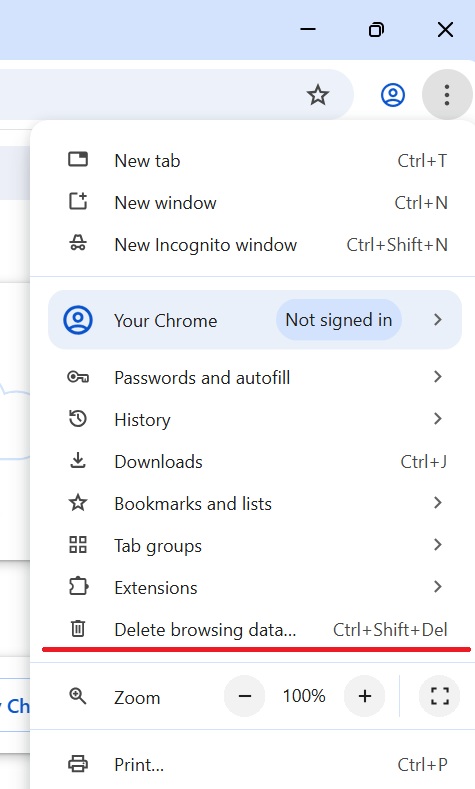
Open Chrome’s main menu by selecting the three dots in the upper‑right corner and choose “Clear browsing data.”
In the window that opens, make sure to select the appropriate time range. The recommended option is “All time” to remove all stored browsing data that may be causing issues.
If you have important saved passwords, sign‑in data, or form information, you do not necessarily need to clear those items — you can leave them unchecked.
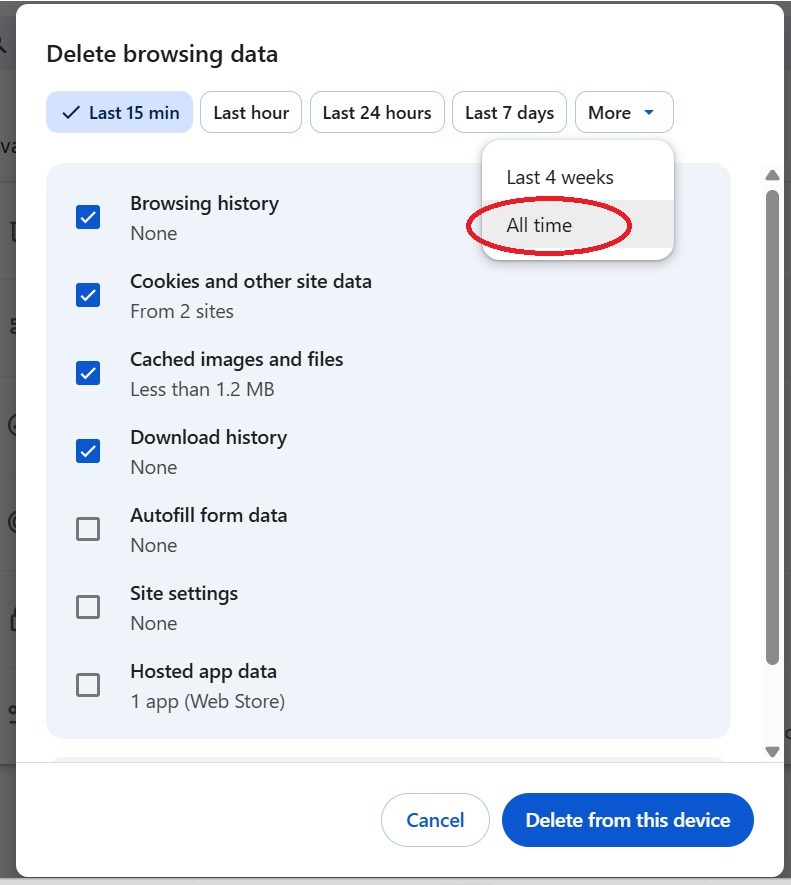
Finally, click “Clear data.”

Open Firefox’s main menu by selecting the three horizontal lines in the upper‑right corner, then choose “History”, followed by “Clear Recent History…”.
In the window that opens, select the appropriate time range. The recommended option is “Everything” to remove all cached data that may be causing issues.
If you have important saved login or form information, you do not necessarily need to clear those items — you can leave them unchecked.
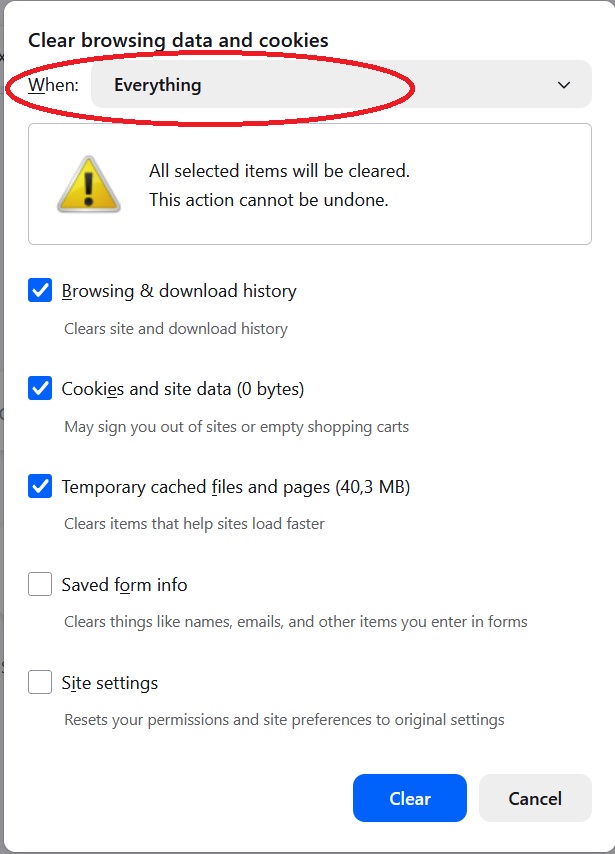
Finally, click “Clear” to clear the selected data.
Open the “History” menu at the top of the screen and select “Clear History…”.
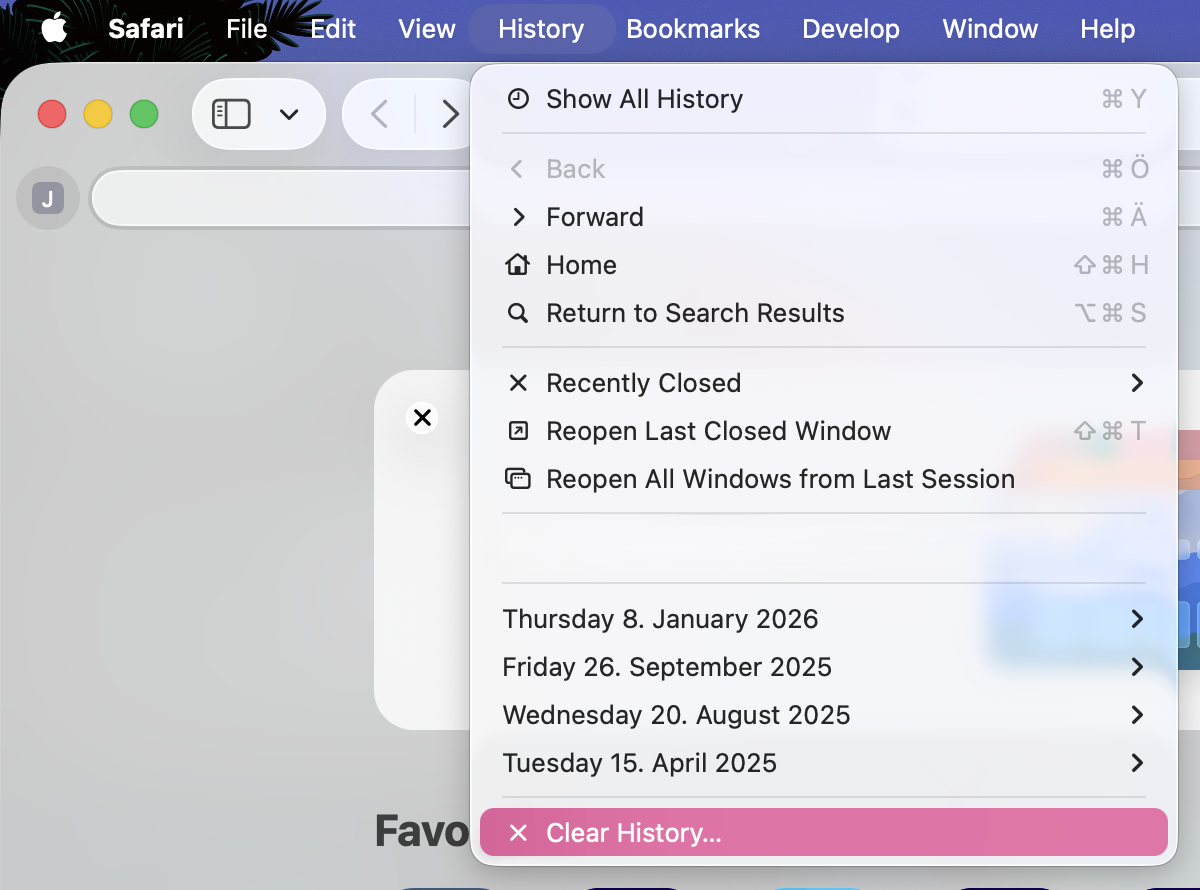
In the window that opens, choose the appropriate time range. The recommended option is “all history” to remove all cached data that may be causing login or browsing issues.
If you have important saved website data or preferences, you do not necessarily need to clear everything — you can adjust the selection based on what you want to keep.
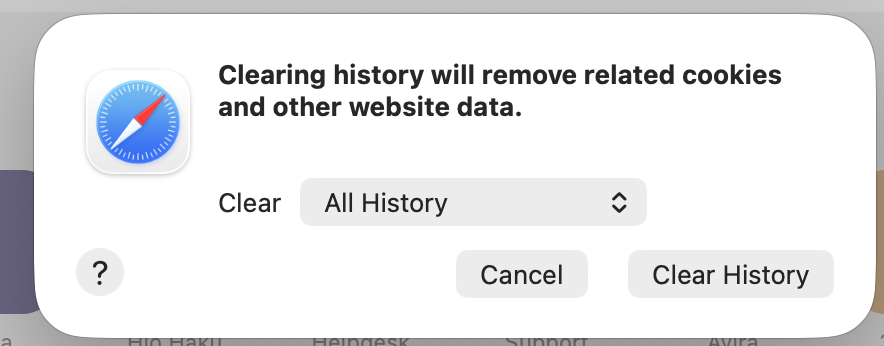
Finally, click “Clear History” to complete the process.