Maturity test in EXAM
Please note that as from 1 August, 2024, students who have received their education in a language other than Finnish or Swedish or abroad, may write maturity test in Finnish (Swedish), if they want. Otherwise, they are exempt from writing a maturity test.
Instructions
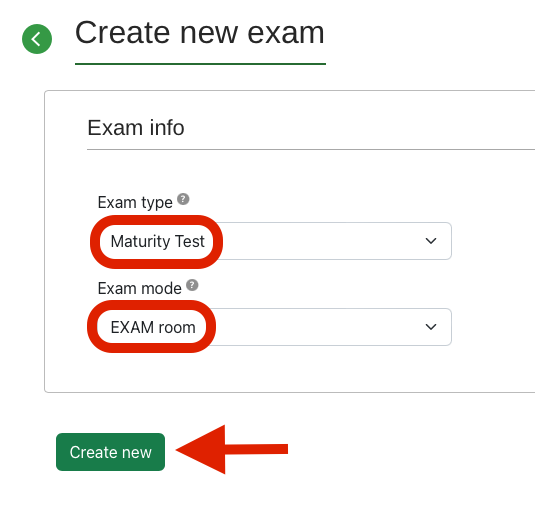
1. Create a new exam by clicking Create new exam on your Dashboard.

2. Add information to your exam by choosing the exam type as Maturity Test and exam mode as EXAM room. Use the exam mode BYOD – unrestricted (instructions) if the student uses his/her own computer in an unsupervised setting. Examples of cases to use BYOD – unrestricted:
-
- Master’s degree maturity test or
- the student has individual special arrangements that can not be arranged in Examstudio.
Click the Create new button.
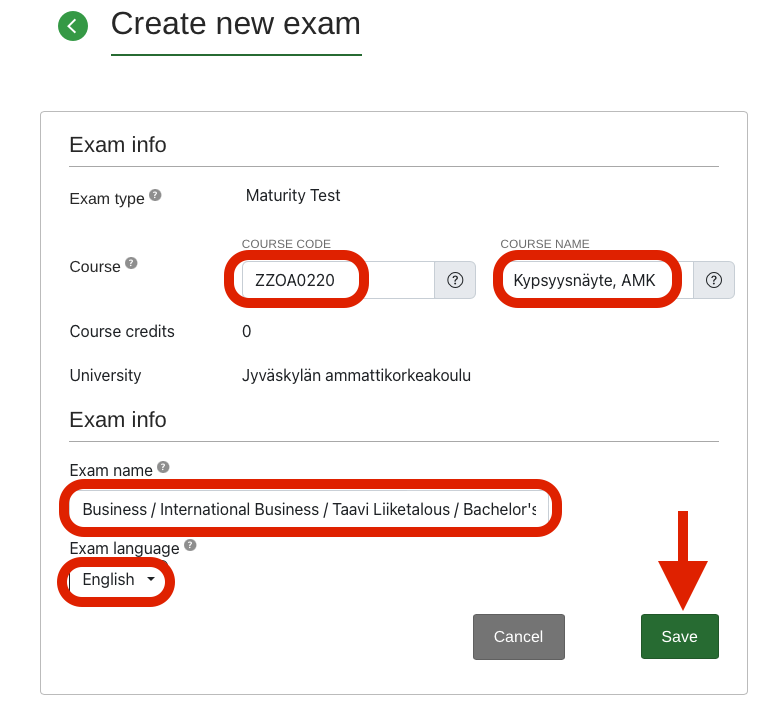
3. Complete the exam info. Find the maturity test by searching with Peppi code or course name:
-
- Bachelor’s maturity test: ZZOA0220
-
- Master’s maturity test: YZ00BB05
Name the exam using the format ”School / Field of education / Your Name / Bachelor’s maturity test”.
-
- In case of Master’s maturity test, switch “Bachelor’s” to “Master’s”.
-
- If the student has extended time, name the exam using the format ”School / Field of education / Your Name / Bachelor’s maturity test / extended time”.
Language of the exam is Finnish by default.
-
- Change to Swedish, if needed. Please note that maturity tests are no longer conducted in English at Jamk.
Click Save.
4. Fill in the basic information as follows:
-
- Requires language evaluation: Yes (Bachelor’s), No (Master’s)
Selection for language evaluation can not be changed after the maturity test has been created! Please note that the language evaluator is not added as an examiner.
Click Save. Then, click Questions.
5. Add a question.
-
- Write Maturity test to the section name. Section name is a mandatory field. You may write optional instructions for the students in the Section description. These instructions will be visible to the student during the exam.
-
- Add a question from the question bank or create a new question. Question type for maturity test is Essay question.
-
- Copy the maturity test writing instructions to the text editor. If the student has received his or her school education in Swedish, please copy the maturity test writing instructions in Swedish.
-
- Response length in words: 400
-
- Grading scale: Pass/Fail
-
- Additional information fields can be left blank in the maturity test.
-
- Add a question from the question bank or create a new question. Question type for maturity test is Essay question.
Click Save.
6. Fill in the assessment settings as follows:
-
- Grading scale: Pass/Fail
Click Save.
7. Publish the maturity test. Move to the Publish tab:
-
- Set the timetable for the exam in the Exam period:
-
- Starts: the first possible date.
-
- Ends: the last possible date.
-
- Set the timetable for the exam in the Exam period:
-
- Exam duration (in minutes): 120
-
- If the student has been granted extra time with individual special arrangements, set the duration to 195 minutes.
-
- Exam duration (in minutes): 120
-
- Add a participant: “EXAM user” is set by default: write the student’s name to the field > Choose the student > Click Add.
-
- If you do not find your student’s name or there are multiple students with the same name and you are not sure which name is correct:
-
- Choose New users > Write the student’s email address > Click Add.
-
- If you do not find your student’s name or there are multiple students with the same name and you are not sure which name is correct:
-
- The student will receive an invitation email and he/she can reserve a time for the maturity test.
The maturity test written in EXAM is checked by the thesis supervisor, i.e., the examiner. The examiner receives an email when the student has completed the maturity test. You can access the link in the message to evaluate the maturity test. NOTE! The supervisor evaluates the content of the maturity test in EXAM before the language evaluation. If the content passes the evaluation, the test is sent for language evaluation. The language evaluation is done by a teacher from the Language Centre.
The student’s answer to the maturity test can be found on the dashboard under the “Unassessed exams” tab. The “Unassessed” column displays the number of unevaluated exams (1). Select the column number:
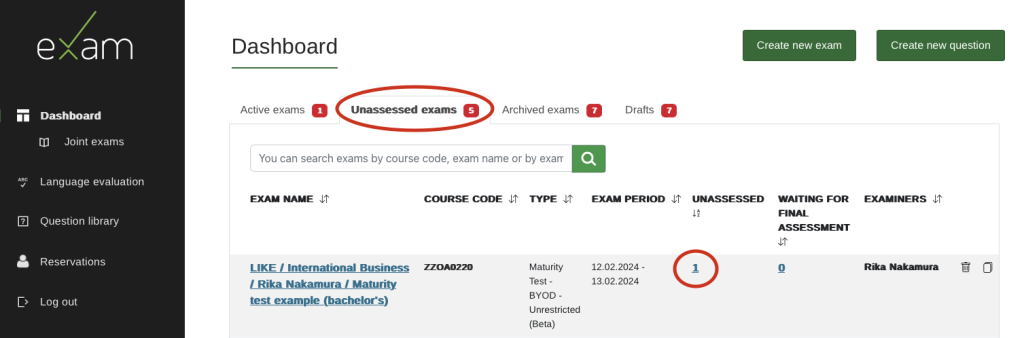
From the next view, you can select the student’s name and then you will be able to read their answer:

The student’s written answer is displayed as text in the browser, below the question. At the beginning of the answer, you will find basic information about the exam, such as the reservation time, completion time, and any previous answers the student may have given to this exam. If you wish, you can print the student’s written answer on paper or save it as a PDF file using the “Print” button. If necessary, you can send an email to the student via the email link.
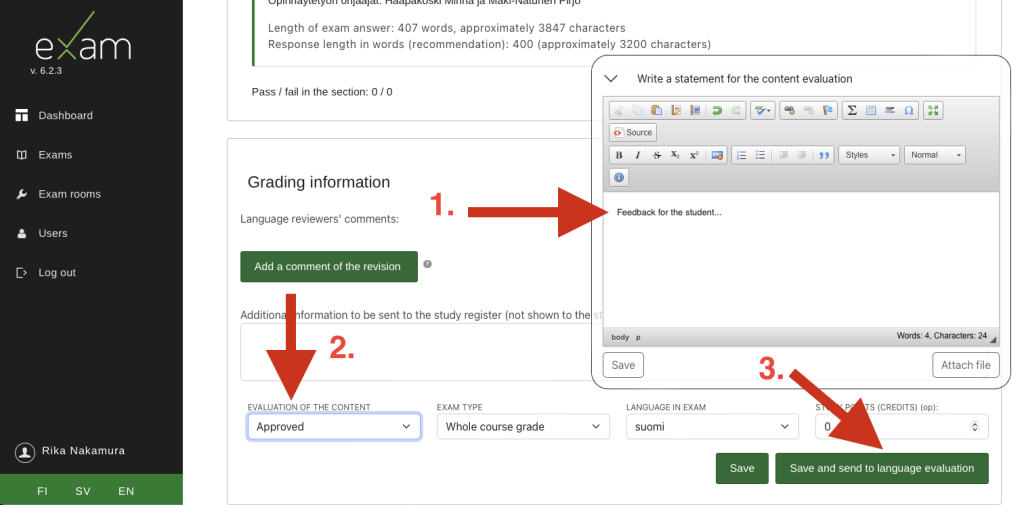
- The maturity test is graded as either “Pass” or “Fail.”
- Write your written feedback in the “Write a statement for the content evaluation” window. Providing feedback is mandatory for the maturity test. You can add feedback such as “Content approved” or similar and press Save. You can save the evaluation as incomplete by pressing the “Save” button and continue the evaluation later.
- If the maturity test is not sent for language evaluation (Master’s), press “Save and lock the assessment.”
- If the maturity test is sent for language evaluation (Bachelor’s) and if the content of the maturity test is approved, select “Save and send to language evaluation“. This action also saves the evaluation. The maturity test will move to the status “Waiting for final evaluation” and “Waiting for language evaluation.”
- When the language evaluator has completed the language evaluation, you will receive a message that the language evaluation is complete.
- The supervisor marks the maturity test as completed in Wihi after the evaluation is locked. The submission can also be found in your Archived exams list in EXAM.
After the content evaluation, the maturity test will be transferred to language evaluation. All language evaluators can see all maturity tests waiting for language evaluation.
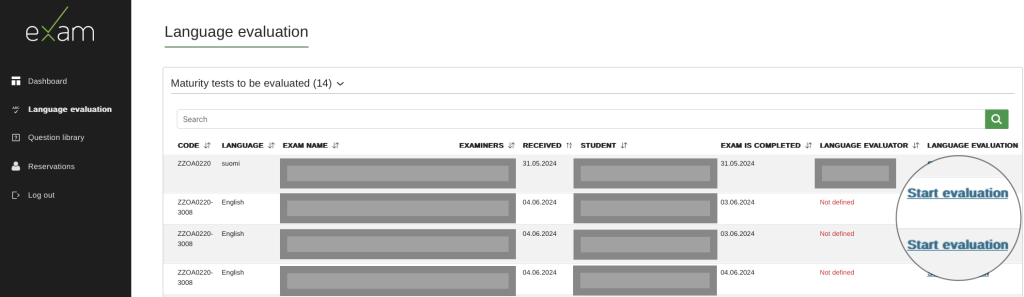
The “Maturity tests to be evaluated” list shows all maturity tests that are currently in language. You can sort the maturity tests by code, exam name, examiner (supervisor), arrival time (when it arrived for language evaluation), student, exam completion time, or language evaluator.
Take a new maturity test for language evaluation by selecting “Start evaluation”.
When the maturity test has been taken for language evaluation, the language evaluator’s name will be displayed in the list. All language evaluators can see all maturity tests under evaluation, and another maturity test under evaluation can be taken for oneself by selecting “See here.” When you write feedback on the maturity test and save it, the language evaluator will change. You can send an email to the student and the language evaluator by clicking on their email addresses.
The student’s written answer is displayed as text in the browser, below the question. At the beginning of the answer, you will find basic information about the exam, such as the reservation time, completion time, and any previous answers the student may have given to this exam. If you wish, you can print the student’s written answer on paper or save it as a PDF file using the “Print” button. If necessary, you can send an email to the student via the email link.
At the end of the page, you can see the feedback written by the supervisor on the content and the evaluation information.
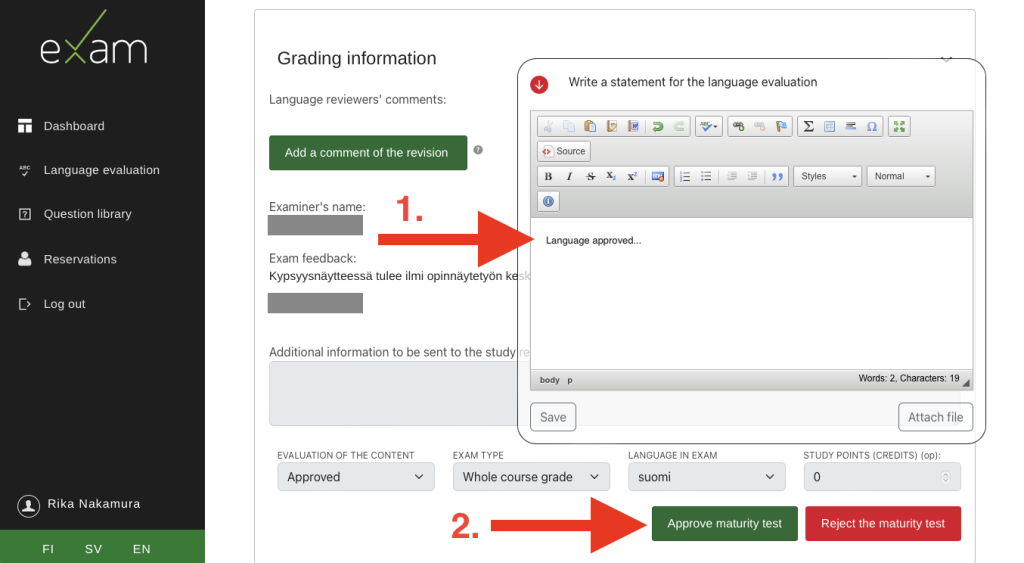
- Write your written feedback in the “Write a statement for the language evaluation” window (mandatory). You can add feedback such as “Language approved”. Press “Save.” You can also add feedback as an attachment.
- Select “Approve maturity test” or “Reject the maturity test” depending on whether the language was approved or failed.
- When the language evaluator has completed the language evaluation, the supervisor will receive a message that the language evaluation is complete.
- The student will also receive a message that the evaluation is complete and will be able to see the evaluation of the maturity test in EXAM, as well as the feedback written by the supervisor and language evaluator.
- The supervisor marks the maturity test as completed in Wihi.
If the language of the maturity test is failed, the supervisor will create a new maturity test (re-exam) for the student in the system.
Evaluated maturity tests can be found in the “Evaluated maturity tests” list. The evaluation can be seen by clicking on the name of the exam.
- You can add more students to the maturity test also after publishing the exam. However, you may not remove a student from the maturity test after publishing it.
- If the student does not complete their maturity test during the time that they have reserved, you will be sent an email informing you that the student has not used the time that they have reserved. This unreserved time will be displayed in the section titled “Did not arrive at exam (1)” in the Study attainments tab. To allow the student to reserve a new time, you must reopen the registration process to the student by clicking the link in the Did not arrive page.
- If the student does not reserve a time at all, the student will be able to reserve a new time after you have extend the exam period.
- Remember to save the changes you made to the exam period at the end of the Publish page.
Extra time
Students receiving individual support may be granted extra time to complete the maturity test. If a student has been granted extra time by a decision of individual support, the exam duration is set to 180 minutes.
When assessing the content of the maturity test, add a note about the extra time in the “Feedback to the student” window. You can add feedback such as “Content approved. The student had extra time in the exam” and press Save.
Information about the extra time is important so that the language examiner can guide the student appropriately.
Aids and Medications
If a student needs to bring medications, snacks, or aids to the Examstudio, this must be communicated to the Examstudio supervisors in advance by sending a service request through the Helpdesk. The service request should include the student’s name, exam time (if known), and information about what the student will have with them in the Examstudio.
A new exam has to be created for retakes of the maturity tests. Please follow these steps:
-
- Make a copy of the maturity exam (the copy icon is displayed on the EXAM desktop in the right corner of the exam name bar).
-
- Rename the copied exam – remove “COPY” and add “retake” to the end of the exam name.
-
- Set the exam period and check the exam settings.
-
- Add the student to the exam and save and publish the exam.