Creating an Assignment activity
You use the assignment activity to give students assignment instructions, collect students’ assignment submissions, and provide grades and feedback.
- Students can submit
- a variety of files or
- they may type their answers into a text editor as online text.
- Students can submit assignments individually or as a member of a group.
- Group submission requires that groups have been added to the course and the groups have been combined with a grouping.
- The submitted assignments can only be seen by the student/group and the teacher.
- If you want your students to submit assignments for peer review, we recommend using the Forum activity where the assignment is submitted as a forum post attachment and peer reviews are given through comments on the original post.
1.Plan the assignment instructions.
Good assignment instructions include at least:
- Purpose: Why should the student complete the assignment? How is the assignment related to the topic to be learned?
- Objective: What should the student learn by completing the assignment? (Curriculum)
- Procedure: What does the student do to complete the assignment? What kind of phases are included? Add numbered lists and make the text clear.
- Assessment: What kind of criteria are used for assessing the assignment? What is required for a passing grade/different grades?
2. Include the assignment instructions in the Description field.
- You can also include additional instructions in a file or, for example, a template file to the Additional files field. Remember to instruct the students in the Description field that they need to take a look at the attached file as well.
- It is advisable to add a note about possible restrictions in, for example, the accepted file type or if Turnitin has been activated in the assingment because this has an effect on how students need to proceed when submitting the assignment.
3. Determine the assignment activity settings.
Check at least Availability, Grade, and Activity completion.
- Availability
- Submission types
- Feedback types
- Submission settings
- Group submission settings
- Notifications
- Turnitin
- Grade
- Common module settings
- Restrict access
- Activity completion
1. Determine the assignment Availability settings.
Determine at least Due date and Cut-off date.
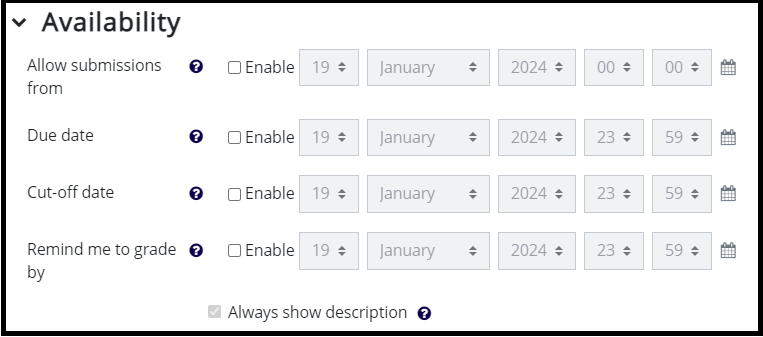
- Allow submissions from: You can determine whether your students can start submitting their assignments only after a certain date. If this date is not enabled, students can start submitting straight away.
- Due date: Determine the due date of the assignment. The due date is visible automatically in the assignment activity. Assignment due date is visible in the students’ Moodle calendar and Timeline on Moodle Dashboard. Students can submit assignments late after the due date. Students can also change their submissions if the submission has not been locked during grading.
- Cut-off date: The cut-off date closes the assignment and students cannot submit assignments anymore. After the cut-off date, students cannot edit their submissions anymore unless the teacher permits this separately in the submission settings.
- Remind me to grade by: You can choose a date when Moodle reminds you about grading the assignments. You can see the notification on Moodle Dashboard on the Timeline. You can see the assignment and the number of submissions that need grading.
2. Determine what kind of submissions students can make.
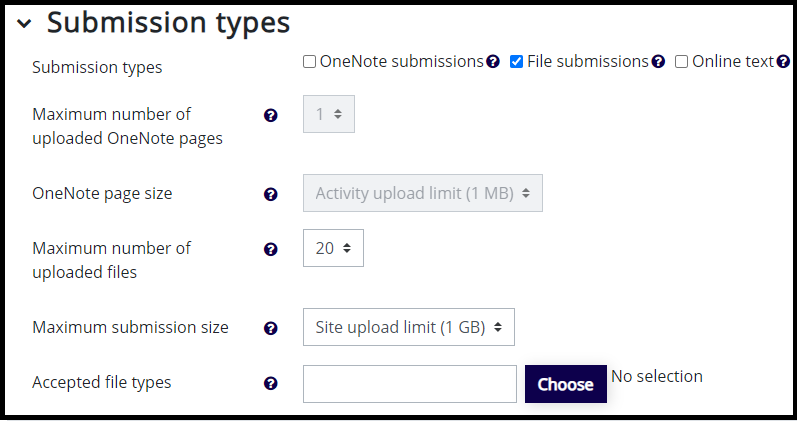
- File submissions: the default setting: students can submit one or more files.
- Online text: students can submit, for example, a link or some other short text which they type directly to a text editor.
- Accepted file types: note that if you determine that the students can only submit pdf files, you can utilize the Annotate PDF function in Moodle. Students’ submissions open in the Moodle grading view, and you can grade and give feedback without downloading student submissions to your computer. If you do not restrict file type and your students submit any other type of files, you need to download the files to your computer in order to read them.
- To limit the accepted file type, click Choose next to Accepted file types. Search for Document files. Click Expand. Tick PDF document .pdf and scroll down to save.
- If you limit the accepted file type, it is good to inform the students in the assignment instructions that they can only submit certain type of files.
3. Determine how you give feedback

- Feedback comments: you can write your feedback comments into a text box in the grading view. The students can see the comments after you save them.
- Annotate PDF: If the students have submitted pdf files, you can annotate them in Moodle. You can add comments, draw etc. You can annotate directly in the browser.
- Feedback files: If you want to include a feedback file or a model answer file in your feedback, tick Feedback files.
- Comment inline refers to Online text submissions.
4. Determine the more precise submission settings.
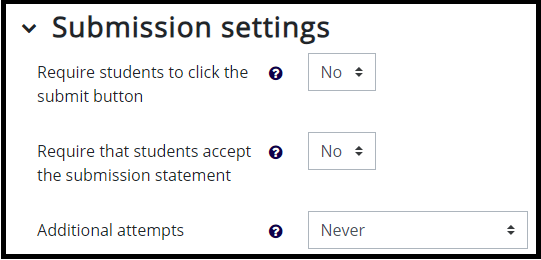
- Require students to click the submit button
- If Require students to click the submit button setting is set to No, students can submit files but also change the submitted file if the teacher has not locked the submission after grading it or the cut-off date has not been passed yet.
- If Require students to click the submit button setting is set to Yes, students need to click a separate Submit assignment button after adding the file to Moodle and saving it. They see the text Draft (not submitted) when the button has not been clicked.
- NB. If you activate Require students to click the submit button, inform the students about this in the assignment instructions so that students know to pay attention to this when submitting their assignments.
- Require that students accept the submission statement
- Activating the Require that students accept the submission statement creates a similar extra step to the submission process. In stead of this setting, it is recommended to use Turnitin to check similarities. Instructions on how to activate Turnitin below.
- If Require students to click the submit button setting is set to No, the teacher should Lock student submissions before grading so that students won’t be able to change or edit submitted files after grading.
- You can find the Lock submissions option when you choose the View all submissions option in the assignment.
- Choose the students who have submitted a file by ticking the boxes in front of their names, and click Go at the bottom of the participant list.
- After locking the submission, the text Submission changes not allowed appears next to student submission. After this the teacher can grade the submissions.
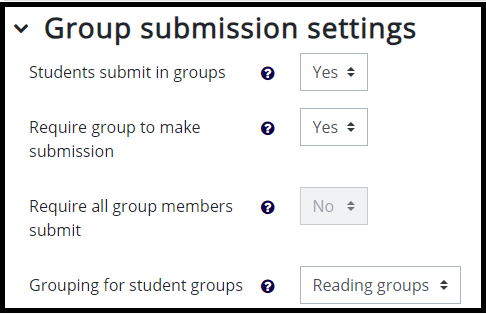
5. If students submit assignments in groups, determine Group submission settings.
If you want your students to submit group work, you need to take the following steps before adding an assignment activity
- Divide the students into groups
- Students can make their own groups or
- students can choose a group and
- the groups used in the assignment have been joined with a grouping.
After this you choose the group submission settings
- Students submit in groups: Yes
- Require group to make submission: Yes
- Grouping for student groups: Choose a grouping that you have used to join the groups
6. Determine Notifications settings.
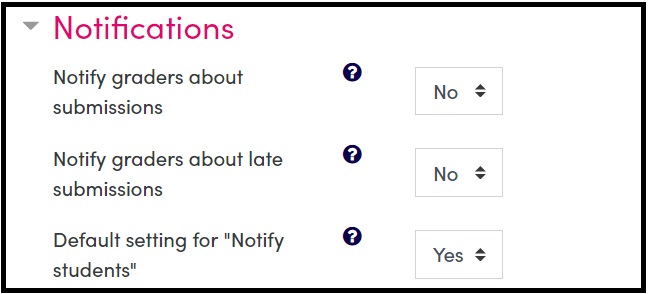
You do not need to change any of the Notifications settings if you do not necessarily want to. Click the question marks for further information on these settings.
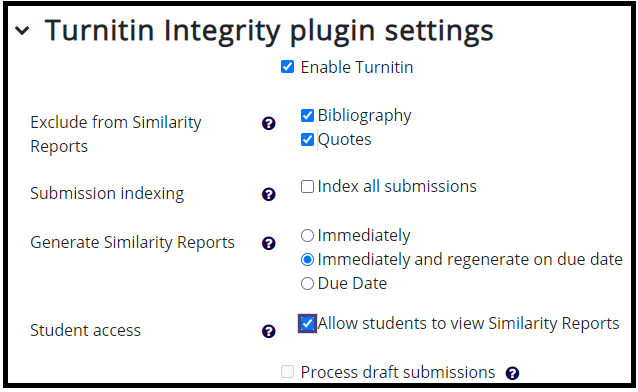
7. Activate Turnitin Integrity plugin settings if necessary.
Turnitin checks the similarities of the content submitted by students with material published on the internet, in books, and other documents checked by Turnitin. Inform students in advance if Turnitin has been activated for the assignment.
It is recommended to enable students to view similarity reports so that they can use the report, for example, to improve their citation techniques.
8. Determine how the submitted assignments will be graded.
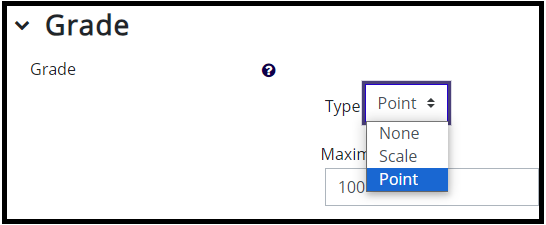
First, you choose the Grade type:
- None: grading is not used in this assignment activity. If grading is set to None, the activity does not appear in Course grading Grader report.
- Scale: you can use a scale, for example, 0-5 or failed-passed. Choose the scale from a drop-down menu.
- Point: you can grade with points and type the maximum amount of points used in this activity to the Maximum grade field.
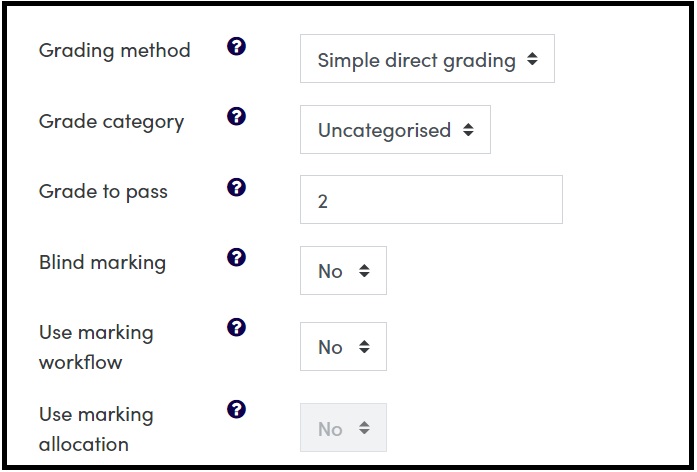
Grading method:
- The default is Simple direct grading. This means that you give a grade and type some feedback of the assignment.
- Learn more about Marking guide and Rubric with your E-learning designer.
Grade category:
You can create grade categories in the gradebook. You can have separate categories for, for example, weekly assignments, optional assignments, or group assignments.
- If you have not created any categories, you do not need to change this setting.
- If you have created categories for assignments, you can choose, which category this assignment belongs to and the grade will appear in the correct category.
- Ask more from your E-learning designer.
Grade to pass:
The most important setting to determine is Grade to pass. This highlights passed grades in green and failed grades in red, for example, in the Grading report and Completion progress bar.
- Count which grade on the scale you are using is the passing grade (e.g. on a scale of 0-5, the grade 1 is the second grade on the scale) and enter that grade’s ordinal number into the Grade to pass field.
- In the Failed-Passed scale, the passing grade is 2 as Passed is the second grade on the scale.
- If you use some other scale, you need to count which grade is the passing grade on the scale and type the corresponding ordinal number to the Grade to pass field.
Blind marking:
If you use Blind marking, Moodle hides students’ identity and you can grade the assignments without knowing who has submitted the assignment.
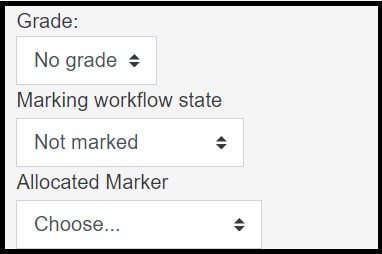
Use marking workflow:
If you want your students to see their grading at the same time and not according to when you grade individual submissions, activate Marking workflow. After you have activated the setting, you can see a drop-down menu for choosing the grading phase both in the View all submissions and in the Grade view.
- The teacher grades an individual student submission and changes the grading phase to Ready for release.
- After grading all submissions, the teacher makes the grading changes visible to all students at the same time in the View all submissions page.
- The teacher chooses the students whose grades will be made visible (tick the box in front of the name), chooses the option With selected… Set marking workflow state and clicks Go.
- A page with a list of the chosen students opens and the teacher can change the marking workflow state to Released.
- By clicking Save changes, the grading becomes visible to the students.
- The student can see the marking workflow state next to the submission, and the grade and feedback after marking workflow state has been changed to Released.
Use marking allocation:
When marking workflow is active, you can determine who grades each student’s assignment. You can choose the grader when viewing students’ submissions. Only teachers can complete the grading.
9. Determine the common module settings.
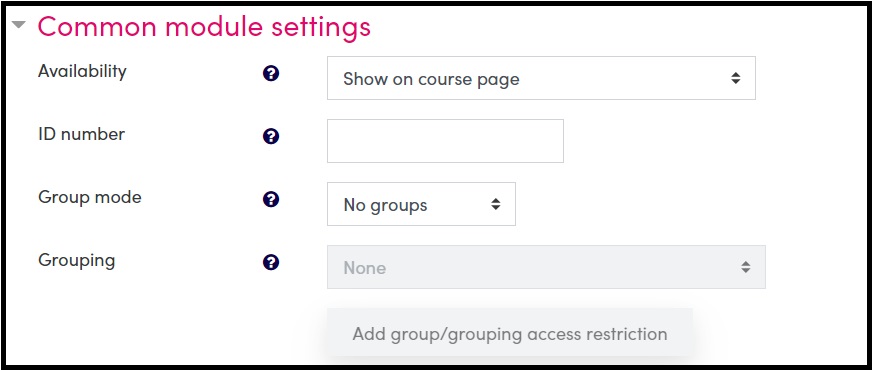
You do not need to change these settings unless you want your students to submit assignments in groups.
If your students submit in groups, choose Group mode and in Grouping the same grouping you used in 5. Group submission settings. This way you can choose to view the groups one group at a time in the grading view.
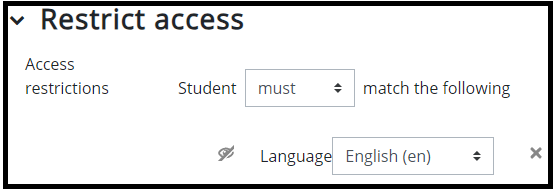
10. Determine access restrictions to this assignment activity.
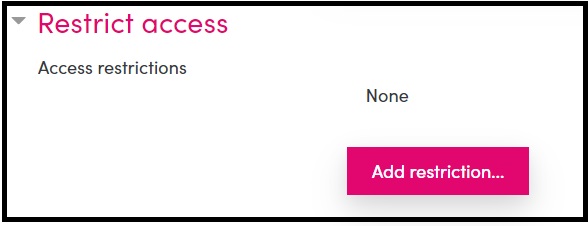
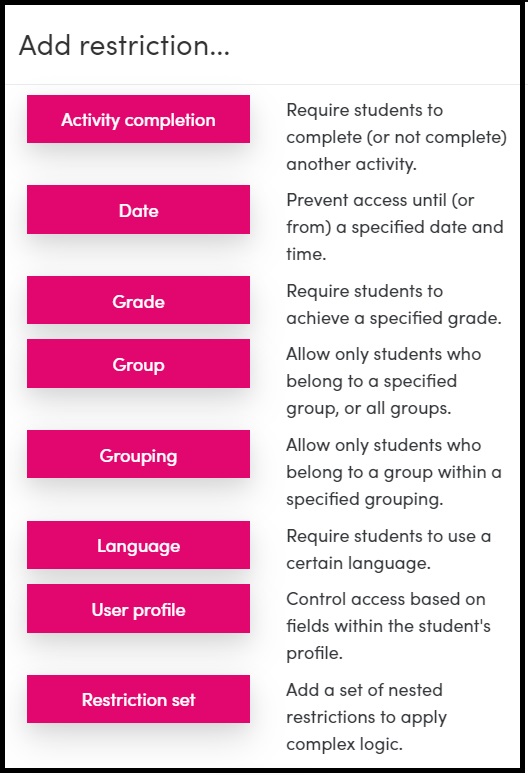
You can use Access restrictions to restrict students’ access to this activity. See below, what kind of restrictions you could add.
The most common restrictions used are
- Activity completion (students need to, for example, submit another assignment/start or answer a certain amount of discussions on a forum/complete a quiz before they can submit this assignment)
- Date (students cannot access this activity before or after a certain date)
- Grade (students need to, for example, get Passed or at least 1 in a previous activity to access this assignment)
- Group/Grouping (only members of certain groups or groupings can access this assignment)
- Restriction set (you can create a combination of restrictions)
After you have chosen a restriction or restrictions, you can also decide whether the assignment is visible on the course
- only to those students who meet the restriction requirements (line over the eye icon) or
- whether the assignment will be visible to all students, with those who do not meet the restriction requirements seeing the assignment in gray and being unable to open it.
11. Determine how students’ activity completion is followed in this activity.
When the teacher activates activity completion settings for an Assignment activity, either so that Students can manually mark the activity as completed or Show activity as complete when conditions are met, the assignment becomes visible in the students’ Completion Progress bar as a blue block. The activity completion requirements defined by the teacher will be displayed in the Assignment activity.
Show activity as complete when conditions are met:
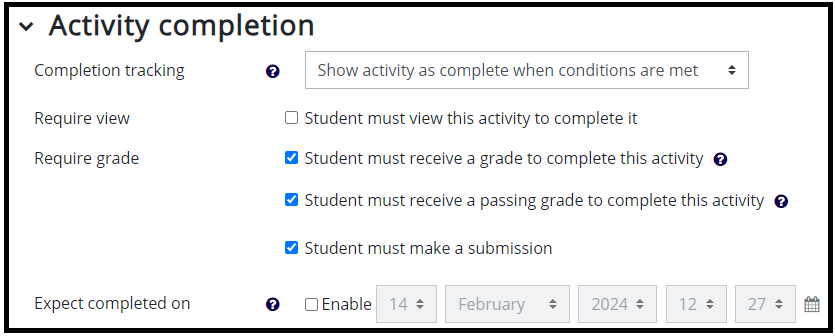
The teacher determines the requirements.
- Choose Show activity as complete when conditions are met in the drop-down menu.
- Student must make a submission: is it enough that the student makes a submission to complete the assignment.
- Student must receive a grade to complete this activity: does the student also need to receive a grade to complete the assignment.
- The two settings above make the completion progress bar turn yellow after student submission and green after grading.
- If you want completion progress to turn red or green based on whether the student receives a failed or a passing grade, make sure that
- you have determined Grade to pass in Grading and
- you tick the box Student must receive a passing grade to complete this activity.