Question bank and Quiz activity
The Quiz activity enables the teacher to create quizzes which include questions of various types (multiple choice, matching, short answer, numerical answer, and essay). The Quiz activity is closely connected to the Question bank.
- The Quiz questions are added to the Question bank which makes is possible to use the questions many times on the same course or on other courses.
- It is crucial to add the questions to categories which you create yourself. Do not save questions to the default category called Default for Kurssimallipohja1.
- When the questions have been saved into categories, it is easy to select questions randomly to quizzes.
- The teacher can limit the number of times a student can attempt to complete the quiz. The quiz can have a time limit and it can be set to open and close at a specific date and time.
- The teacher can determine that a new quiz attempt builds on the previous attempt. In a case like this, the student can see the answers of their previous attempt.
- The teacher can choose how to give feedback to the students during the quiz and after the quiz.
- Each quiz attempt is graded automatically (with the exception of essay questions). The points are saved to Moodle Grade view.
- The quiz activity can be used, for example, for self-assessment or revision purposes.
Teacher steps towards a Quiz:
- Prepare the quiz questions
- Add the categories and questions to the Question bank
- You can import the questions to the Question bank also in a file
- Add the Quiz activity to the course
- Add the questions to the Quiz activity
1. Prepare the quiz questions.
- Plan the quiz questions. All other question types except the essay are graded automatically.
- Plan the category or categories in which you will use for your questions. The categories could be, for example, easy/medium/difficult or categories named according to the themes of the learning content. It is easy to select quiz questions randomly from the categories.
- Plan the points for each question.
- Decide, whether the quiz questions will be added randomly to each student or whether the questions in the quiz are the same for each student. This has an effect on how many quiz questions you need to have.
- Plan student feedback during and after the quiz.
- Create the questions, answer alternatives, and feedback and determine scoring for each question.
- If you use multiple-choice questions or true/false questions see the instructions below on how to structure the questions in a text file and transfer them to the question bank.
2. Add the categories and questions to the Question bank.
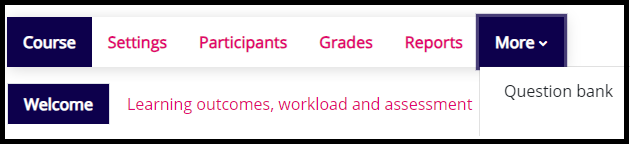
You can find the Question bank in the More menu.
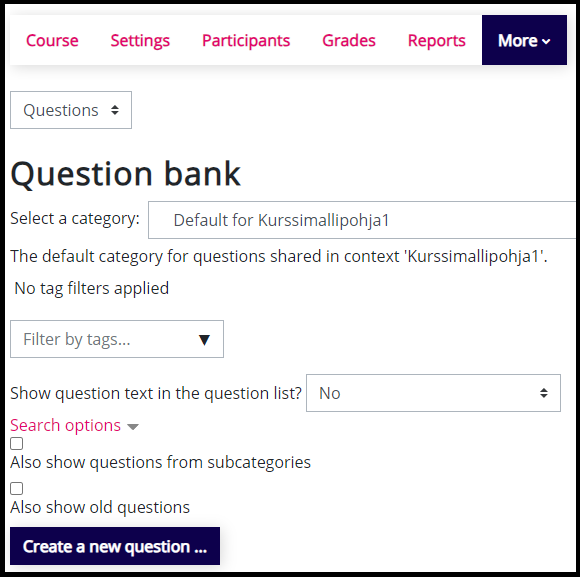
In the drop-down menu at the top of the question bank, you can choose the view that you need (Questions, Categories, Import, Export).
The default category is Default for Kurssimallipohja1. Do not save questions to this category but always create your own categories, for example, under the Default category.
Add the categories.
- Choose Categories in the drop-down menu and click Add category. Give a name to the new category. The parent category can be Default for Kurssimallipohja1. Click Add category.
- Add the other categories you want to create.
Add the questions.
- You can add multiple-choice and true/false questions to the question bank in a file. See the instructions below.
- You can add questions manually to the question bank.
- Choose Questions in the drop-down menu.
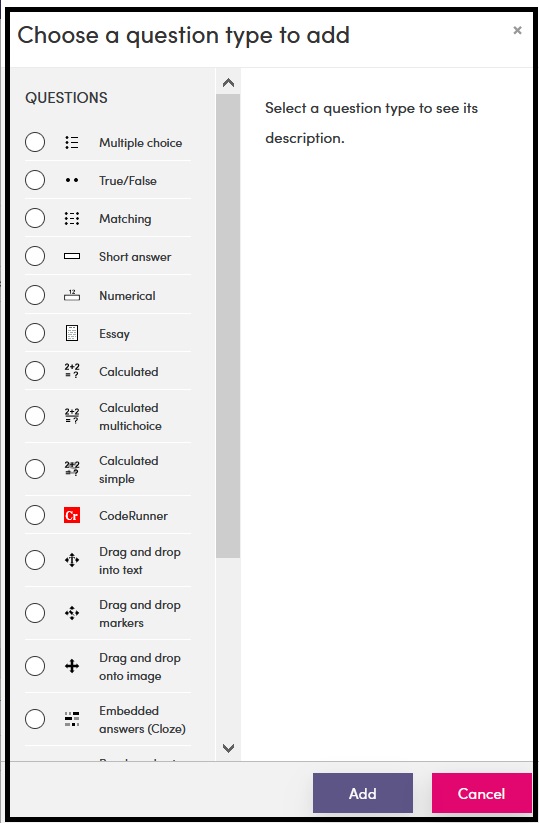
- Click Create new question. Choose a question type to add and add the question details.
If you want to move questions from one category to another, choose the questions which you want to move by ticking the box in front of the question, click With selected and choose Move to. Then you can choose the target folder in a drop-down menu.
3. You can import the questions to the Question bank also in a file.
Write the questions to a text file.
- You save a lot of time when you import multiple-choice or true/false type questions into the question bank categories using a text file.
- Write the multiple-choise or true/false type questions in a text file (.txt). Use the Notepad app.
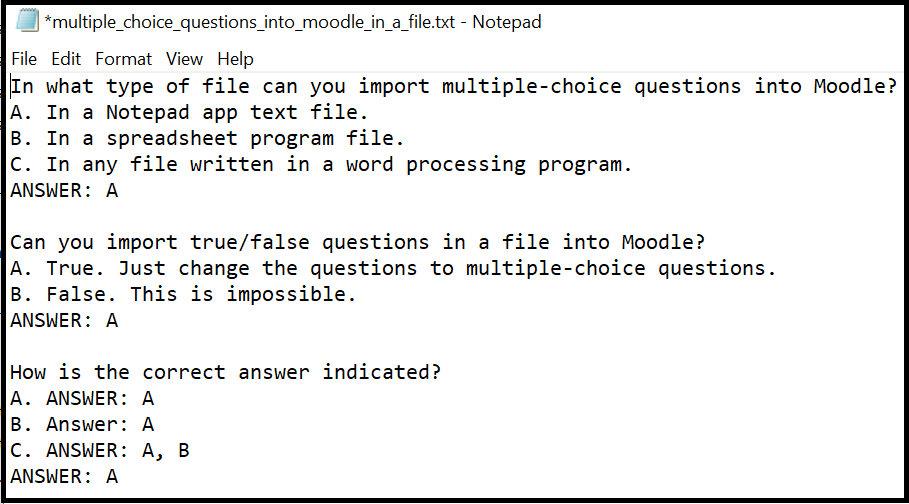
- Follow this formula when writing the questions:
- Write the question or statement on the first line.
- Write the answer alternatives on the following lines, each alternative on its own line. Start each alternative line with a capital letter and a period.
- Write the correct answer alternative on the line that follows the answer alternatives. Write the word ANSWER in capital letters, followed by a colon (:), and the correct answer alternative in capital letters.
- When questions are imported to Moodle in a file, there can only be one correct answer alternative per question and the default number of points per question is 1. You can edit the question to add more correct answer alternatives in the question bank and change the question point value when you add questions to a quiz.
Import the questions to a question bank category in a file.
- Create the necessary categories for your questions in the question bank. Create a separate text file for the questions in each category to facilitate the import to the categories.
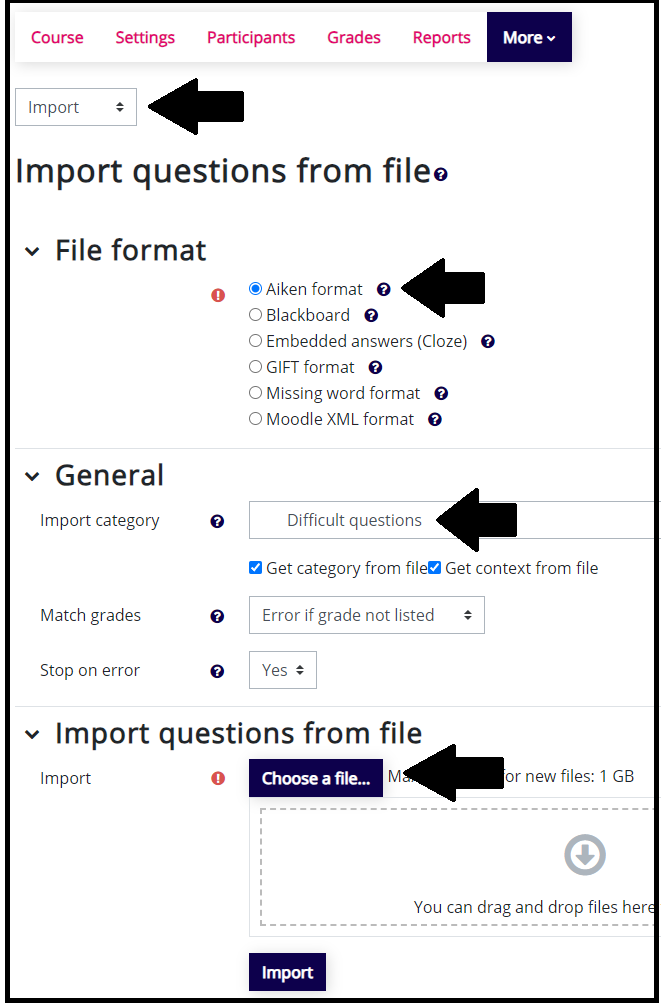
- Go the the question bank and choose Import in the drop-down menu.
- Choose file format Aiken format.
- In General select the category to which the questions will be imported.
- Finally, choose the file containing the questions and click Import.
- If your text file follows the format presented above, the questions will be imported to the question bank category. If there are errors in the file, such as missing periods after the answer alternatives or lowercase spelling of the word ANSWER: indicating the correct answer alternative, correct the errors in the text file and re-import the file into the question bank.
After you have added all the questions to the question bank, you can go to the course view to add the quiz activity.
4. Add the Quiz activity to the course.
After you have added the questions to the Question bank, you can add the Quiz activity to your Moodle course.
Give a descriptive name for the quiz and write the instructions for completing the quiz.
Determine the more precise settings for the Quiz activity.
- Timing
- Grade
- Layout
- Question behaviour
- Review options
- Appearance
- Safe Exam Browser
- Extra restrictions on attempts
- Overall feedback
- Common module settings
- Restrict access
- Activity completion
1. Timing
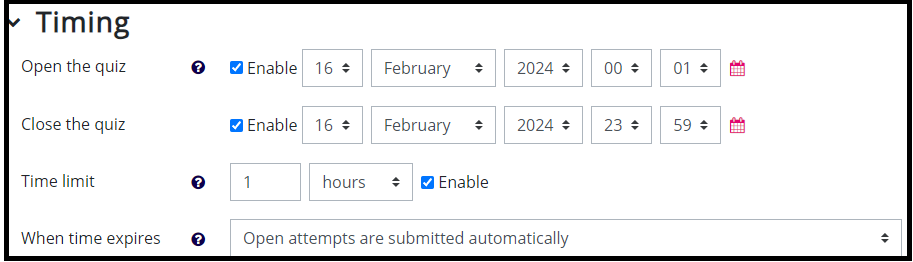
- Determine the time slot when the quiz is visible to the students. The students cannot access the quiz before Open the quiz and after Close the quiz.
- You can give a Time limit for completing the quiz. You can determine that the quiz is accessible on the course, for example, for 24 hours and the student can complete the quiz at any point during that time. Especially in this type of a situation it may be good to determine a time limit for completing the quiz. If the maximum time limit for completing the quiz is, for example, one hour, students can start completing the quiz although the Close the quiz time would be less than one hour away. The quiz closes automatically at the Close the quiz time and all student’s answers are submitted automatically.
- The Time limit counter works if the browser supports Javascript.
- When time expires setting should be Open attempts are submitted automatically.
2. Grade
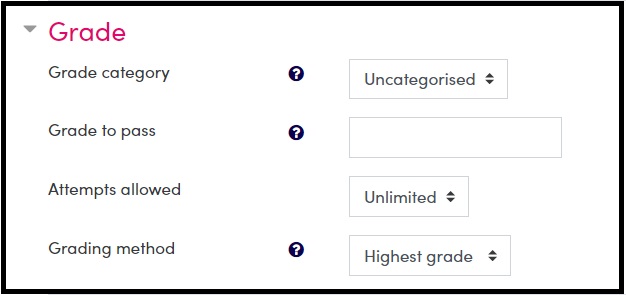
- Determine Grade to pass for the quiz in points.
- You can determine how many times the student can attempt the quiz. For example, a revision or practice quiz can have an unlimited number of attempts.
- When the student can attempt the quiz more than once, you can choose from a selection of grading methods. The alternatives are
- Highest grade
- Average grade
- First attempt
- Last attempt
3. Layout
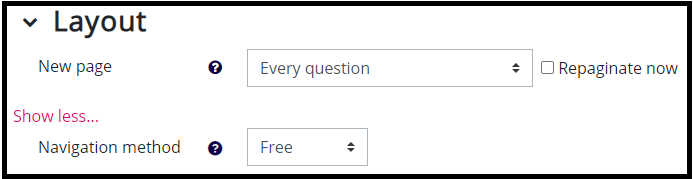
- New page: Every question: The basic setting is that in a Moodle quiz every question has its own page. If you want to have several questions on one page, you can choose the number of questions in a drop-down menu. You can organize the number of questions per page also in the view where you concretely add the questions to the quiz.
- Click Show more to see more settings related to layout.
- Navigation method: Free: The student can move back and forth in the quiz questions also after answering the questions.
- Navigation method: Sequential: The student must progress through the quiz in order and may not return to previous questions or skip ahead.
4. Question behaviour
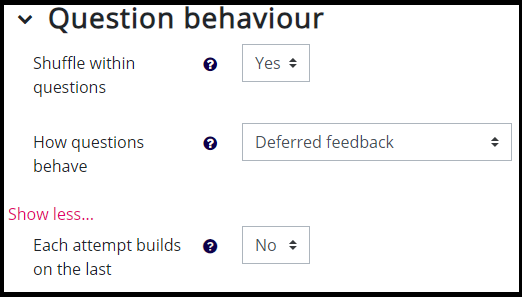
- Shuffle within questions: The default setting is that Moodle shuffles the question parts (for example, multiple choice question answer alternatives). The same setting must be activated in the question settings.
- How questions behave: This setting gives the student various alternatives for interaction with the quiz questions.
- Deferred feedback: Student answer all quiz questions and submit the answers. After this, the answers are graded and students get feedback.
- Interactive with multiple tries: Students can answer quiz questions several times. They can use tips which the teacher has included in the question. Using the tips reduces the amount of points received from the question.
- Adaptive mode: Students can attempt to answer the question again. Incorrect answers reduce the amount of points received from the question.
- Adaptive mode (no penalties): There is no penalty for incorrect responses.
- Immediate feedback with certainty-based marking: Students also evaluate how sure they are they got the question right.
- Deferred feedback with certainty-based marking: The same as Deferred feedback but students are asked to evaluate how sure they are they got the question right.
- Immediate feedback: Students get immediate feedback after answering a question. Students cannot answer the same question again.
- Click Show more to see more settings.
- Each attempt builds on the last: If students are allowed to attempt the quiz several times (unlimited) and Each attempt builds on the last setting is Yes, students can work on the quiz in parts and each new quiz attempt contains the results of the previous attempt. This setting is very good for revision quizzes.
5. Review options

You can determine what the student sees after attempting the quiz.
- During the attempt: you cannot affect these settings.
- Immediately after the attempt: these settings apply for the first two minutes after student has clicked Submit all and finish. Note that if you activate the option The Attempt the student can see the quiz questions, answer alternatives and their own answers.
- Later, when the quiz is still open: what the student sees over the two minutes after ending the quiz attempt and before the quiz close date.
- After the quiz is closed: what the student sees after the quiz close date has passed. If the quiz does not have a close date, these settings are not relevant.
- The teacher can see all this information at all times.
6. Appearance
You can show the user’s picture, determine how decimals are shown in grades, and if course blocks are visible during quiz attempts.
7. Safe Exam Browser
Do not use this.
8. Extra restrictions on attempts

- You can require students to give a password to enter the quiz.
- Click Show more to see more settings. You can determine, for example, an enforced delay between quiz attempts.
9. Overall feedback
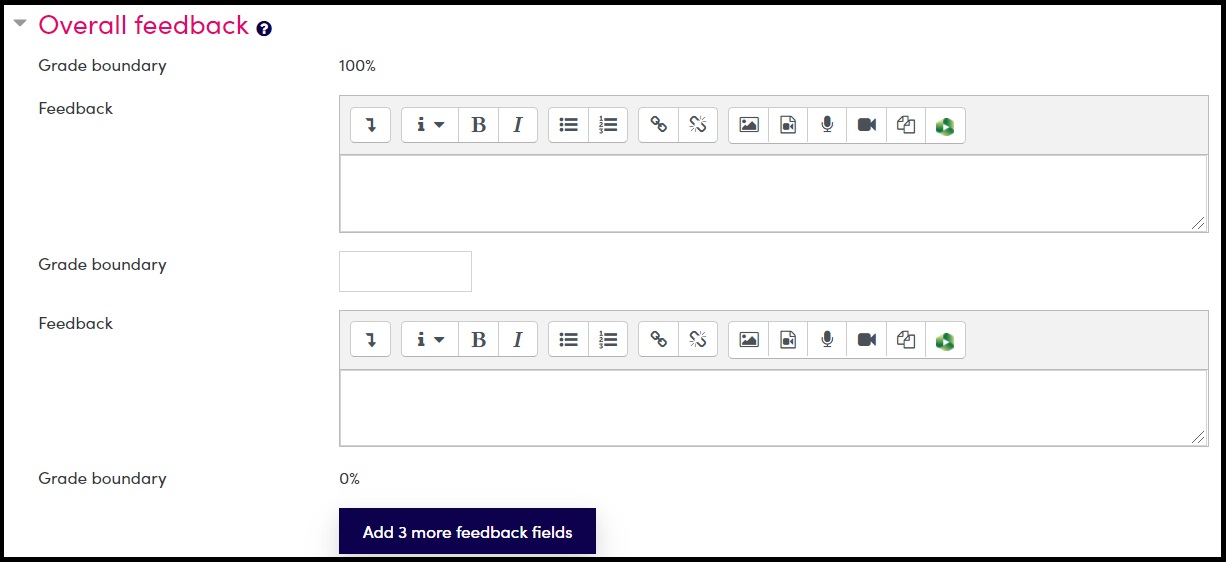
Overall feedback can be shown to the students after quiz completion.
- You can determine that when a student receives a certain percentage of the total number of points, they are shown, for example, the grade or specific feedback on their quiz performance.
- The highest Grade boundary is 100%. In the Feedback field below it, you write the feedback that is meant for the best grade.
- In the next Grade boundary field you write the lower limit at which one can still receive the highest grade, for example, 90%.
- In the next Feedback field you write the feedback for the second best grade and to the next Grade boundary field you write the lower limit at which one can still receive the second best grade.
- In a quiz, the settings may be such that the student passes the quiz by achieving 50% correct. In this case, you write the feedback on passing the quiz in the first Feedback field. In the Grade boundary field, you add 50%. In the second feedback field, you write the feedback that the student receives when they do not pass the quiz.
- For the students to see this overall feedback, the option Overall feedback must be ticked in the Review options.
10. Common module settings
You do not need to change these settings unless you have divided your students into groups and different groups have different quizzes to complete. In this case, you activate Group mode and choose the grouping that can attempt the quiz. You do not need to change these settings if attempting the quiz is not restricted based on groups.
11. Restrict access
You can use Access restrictions to restrict students’ access to this quiz.
The most common restrictions are
- Activity completion (students need to, for example, submit an assignment/start or answer a certain amount of discussions on a forum before they can attempt this quiz)
- Date (students cannot access this quiz before or after a certain date)
- Grade (students need to get a specific grade in the previous activity to access this quiz)
- Group/Grouping (only members of certain groups or groupings can access this quiz)
- Restriction set (you can create a combination of restrictions)
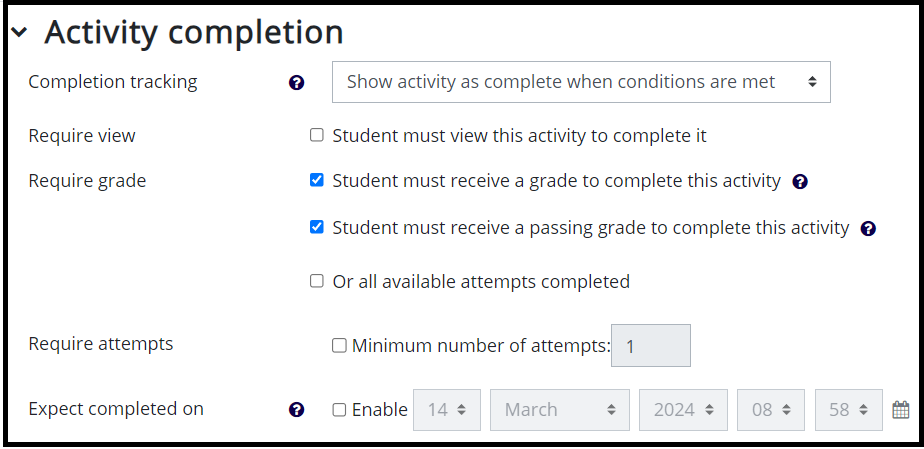
12. Activity completion
If the quiz is for practice purposes, the activity completion setting can be Do not indicate activity completion or Students can manually mark the activity as completed.
If you choose Show activity as complete when conditions are met you can choose the options
- Student must receive a grade to complete this activity and
- If you have determined Grade to pass in the Grade settings, the option Student must receive a passing grade to complete this activity.
Now you have determined the quiz settings and can proceed to add the questions to the quiz.
5. Add questions to the Quiz activity.
After you have determined all the Quiz activity settings and saved the quiz, you need to add questions to the quiz. Click the quiz name on the course page. A page opens and you are informed No questions have been added yet. Click Add question to add questions.

Click Add on the page that opens and choose how you want to add the questions.
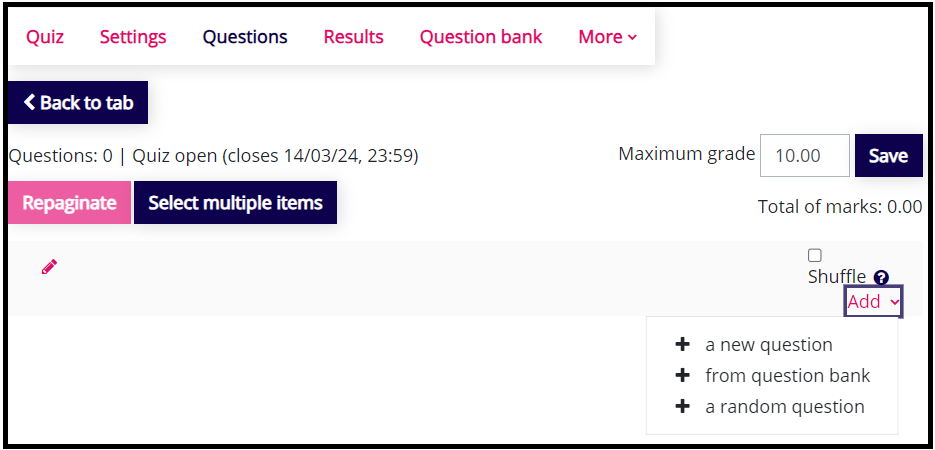
- A new question: You can add a completely new question which is not in the question bank yet.
- From question bank: You can choose questions from the question bank.
- A random question: Choose a category from which you want to randomly select questions, and specify how many random questions you want to add to the quiz.
- If you add a random question or questions, choose the category and the number of questions.
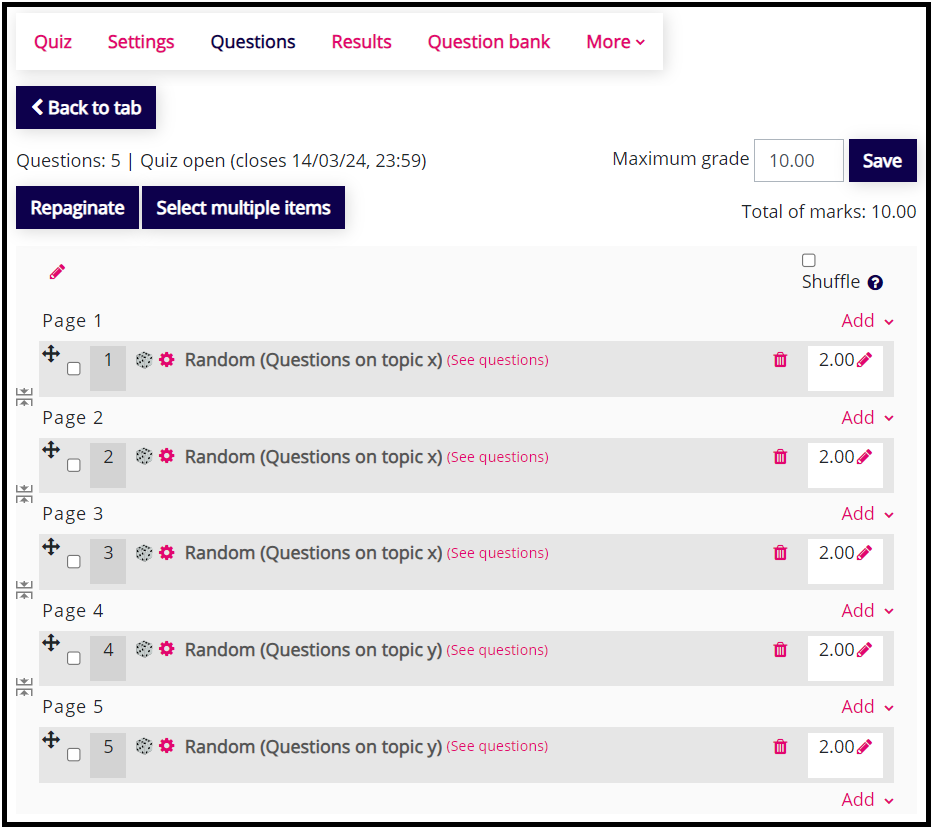
In the image above, you can see that random questions have been added from two different categories.
- You can change the number of points by clicking the pen icon next to the points.
- Remember to update the Maximum grade to correspond with Total of marks and click Save. This number of points is transferred to Gradebook. If you want, you can scale the points. Ask more info from the E-learning designer at your school.
- You can rearrange the questions by dragging them using the four-headed arrow icon located in front of each question.
- You can add questions in between the existing ones by clicking Add on the right below each question.
- You can arrange the questions to pages by clicking the Add/remove pagebreak icon.
After adding all the questions, go to quiz activity settings and check that Maximum grade and Grade to pass are in proportion to each other.
Previewing the quiz
After determining the quiz settings and adding the questions, the teacher can preview the quiz by clicking Preview quiz on the quiz page.
- You can preview the quiz even through the quiz has not been opened to students yet.
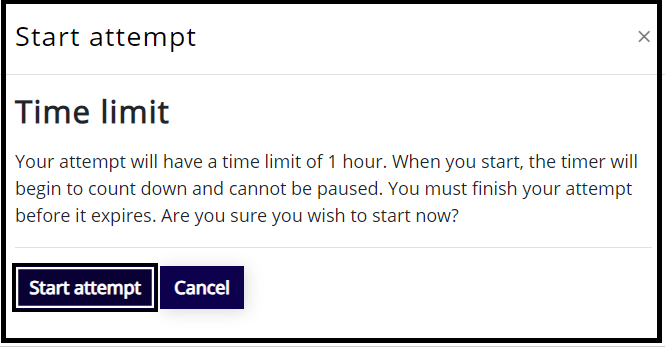
- If the quiz is timed, you are asked to confirm starting the attempt.
In the preview, the quiz looks the same as it would for students.
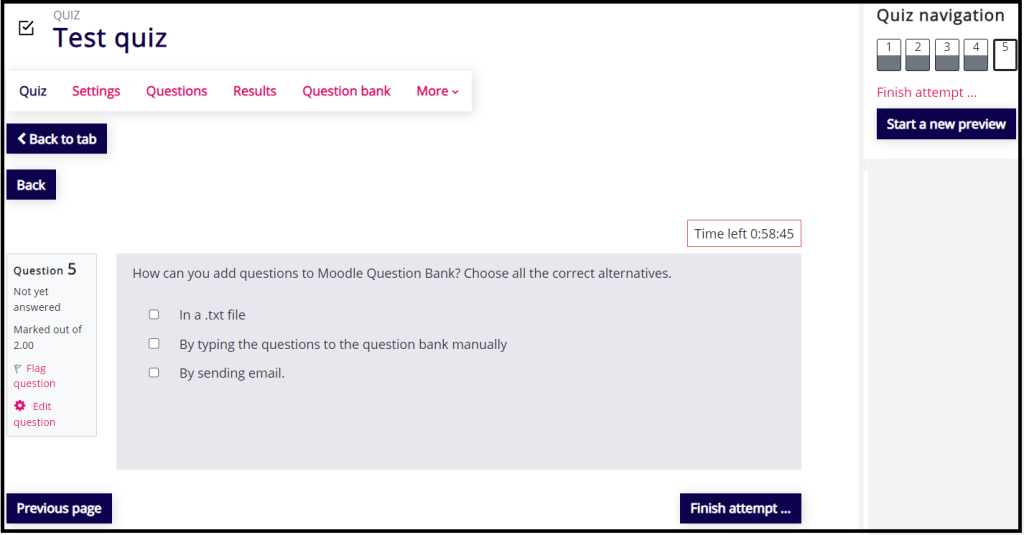
- After completing the quiz you see the Summary of attempt.
- The teacher can see a further summary of the quiz after clicking Submit all and finish. This further summary is not visible to the students if the teacher has deactivated it in the quiz settings.