Adding groups manually or automatically
1. The teacher manually adds groups and participants to the groups.
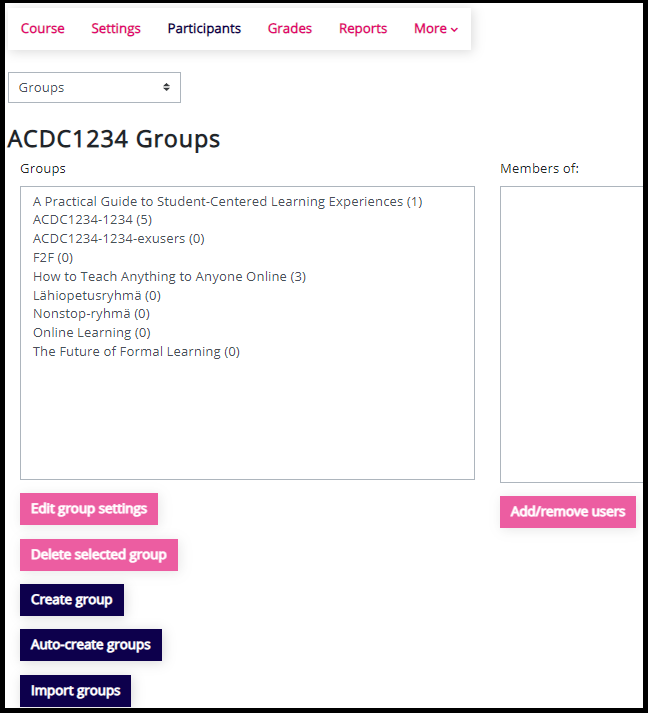
- Click Participants below the course name. Choose Groups in the drop-down menu on the left.
- Choose Create group. This option allows you to create each group one at a time. Simply give a name to the group and save.
- Add the participants by clicking a group on the list and then click Add/remove users.
- When you have the Ctrl button pressed on the keyboard, you can choose several participants at the same time by clicking on their names, and add them to the group all at the same time.
- After you have added all the participants to the group, click Back to groups.
- Choose another group and click Add/remove users.
2. The teacher combines the groups by adding a grouping.
In order to use the groups in, for example, assignment activities, you need to combine the groups with the Grouping option.
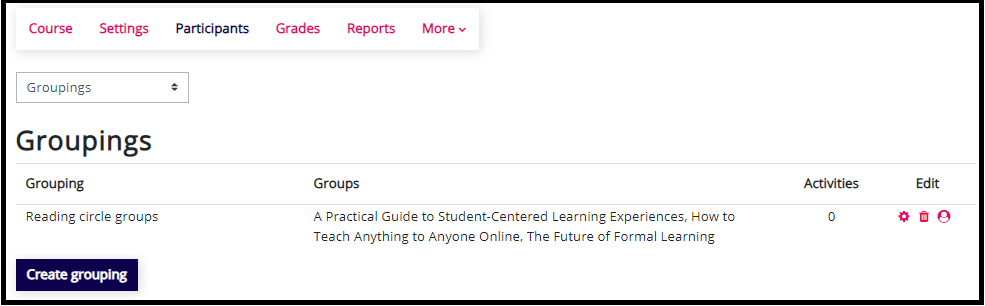
- Choose Groupings in the drop-down menu on the left.
- Click Create grouping.
- Give a name to the grouping and save.
- Click the round character on the right-hand side of the grouping you created and add the groups.
3. The teacher activates group submission in an assignment activity.
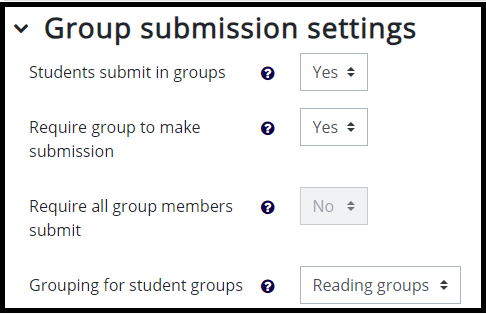
- Open assignment activity settings and activate group submission.
- Students submit in groups: Yes
- Require group to make submission: Yes
- Grouping for student groups: Select the grouping you created from the drop-down menu
- Now, students can choose one member of their group to make the submission. The submission will be visible to all members of that group.
- In the grading phase, it is sufficient to grade one member of the group. The same grade and feedback will be visible to all members of the group.
- It is also possible to give different grades and feedback to each member of the group.
The teacher can also Auto-create the groups.
If you want to divide the students into groups randomly, click the Auto-create groups icon on the Groups page.
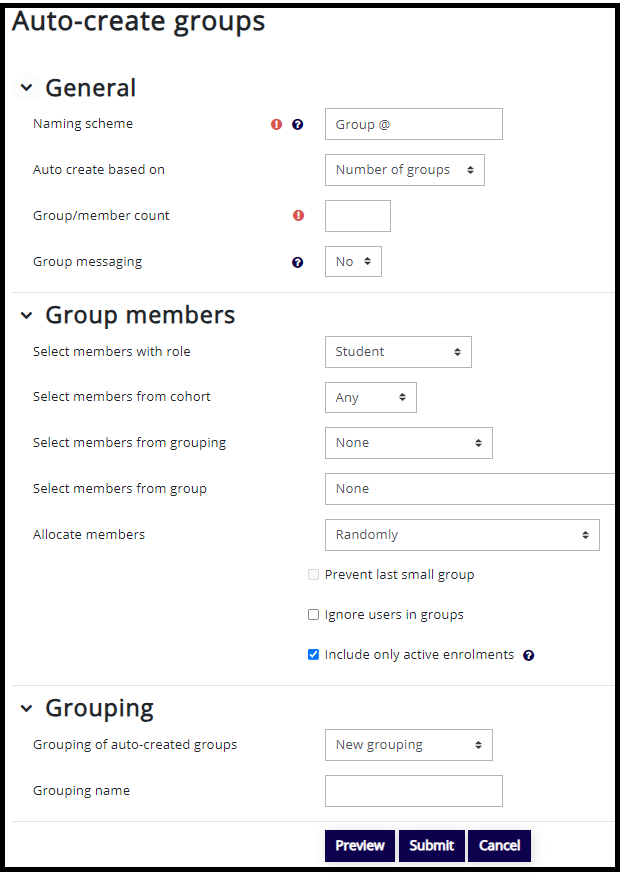
- Naming scheme: @ symbol after the group name creates groups which have a capital letter after the group name (for example Group A, Group B) and # symbol creates groups which have a number after the group name (for example Group 1, Group 2).
- Auto create based on: Choose how many groups you wish to create or how many participants you wish to have in each group. For example, if you want to create 6 groups, select Number of groups and add 6 to Group/member count. If you want to create groups of five members each, select Members per group and add 5 to Group/member count.
- Group members: The default option is to divide the course students into groups randomly but you can make more precise choices if necessary.
- Allocate members: If you choose the option No allocation you get empty groups.
- Grouping: You need to either create a new grouping or choose a grouping you have created before for these auto-create groups.
- Preview: You can preview the groups before creating them.
- Click Submit and Moodle creates the groups.
If you need to move a student to another group.
When the groups are ready, you can see the group participants by clicking the group name. If you wish to move some student to another group,
- Click on the group where you want to remove the student.
- Click Add/remove users and remove the student from the group.
- Return to the groups view and click on the group where you want to add the student.
- Add the student by clicking Add/remove users.