Inclusion
Inclusion is used when students apply for accreditation to optional or elective studies. Inclusion is also used when students apply for accreditation to compulsory studies, provided that they have completed more than 15 credits. The application for inclusion of a course is processed by the person in charge of the degree programme or the person in charge appointed by them.
As regards the study module, the applications are directed to the teacher in charge of the study module team. In the case of transfer students or other larger study modules, the applications are directed to the person in charge of the degree programme or the person in charge appointed by them.
- The person in charge of the degree programme will go through the studies previously completed by the student and make the decision which studies can be included in the degree.
- ‘Excess’ courses of Jamk are cleaned up from PLP so that the extent of the degree is not exceeded. Depending on the practices in the field and Peppi rights, this can be done either by the person in charge of the degree programme or by a career tutor together with the student.
See instructions for including more than 30 ECTS credits
Before processing the application, read the instructions on the previous pages of this guide: eRPL – Accreditation and eRPL application in Peppi.
Application processing
Open the application from the ‘Actions’ drop-down menu on the right side of the application line. Select ‘Process’.
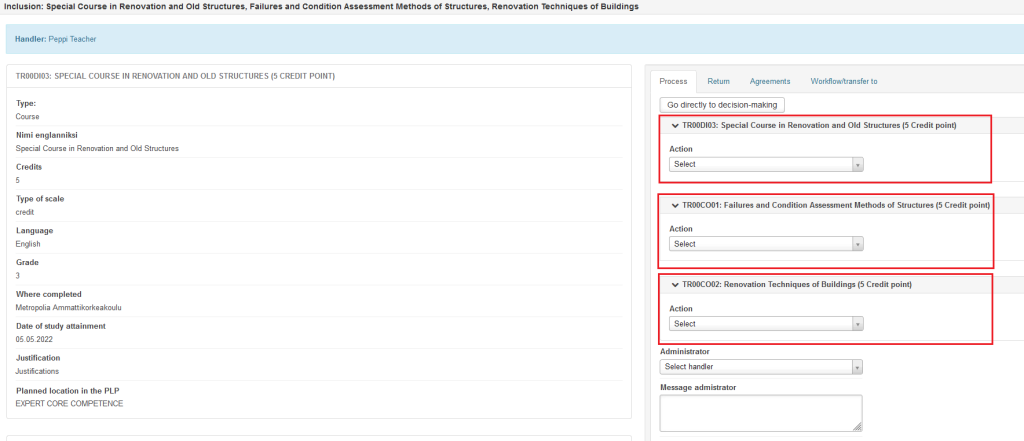
The student must submit an application for the study module so that they have entered the information for each course for the application separately (i.e. not as an actual study module). The application should look like what is shown below (figure 1).
If the student has not done as requested, return the application to the student. Read the instructions in ‘eRPL application in Peppi‘.
Making a decision
Click ‘Go Directly to Decision-Making’ on the ‘Process’ tab. Make a decision on each course separately (Figure 2).
Select a decision from the drop-down menu:
- Approve completely
- Partially approved
- Approved, but competence must be demonstrated (Used only for Prior acquired other competence. See separate instructions on the Prior acquired other competence page.)
- Reject (see instructions at the bottom of this page)

Figure 2. The inclusion decision for each course separately
Decision: Approve completely
Note: As a rule, the ‘Fully approved’ decision is used in inclusion cases. See the instructions for partial approval in the section “Partial approval of the application”.
Enter the information below on the Process tab (Figure 3):
- decision
- the number of credits (see instructions below)
- evaluation (evaluation of the study to be included)
- message to student (justification for the accreditation)
- recorder (choose yourself here)
- you can choose to make notes that are only visible to you in the ‘Message to registrar’ field.
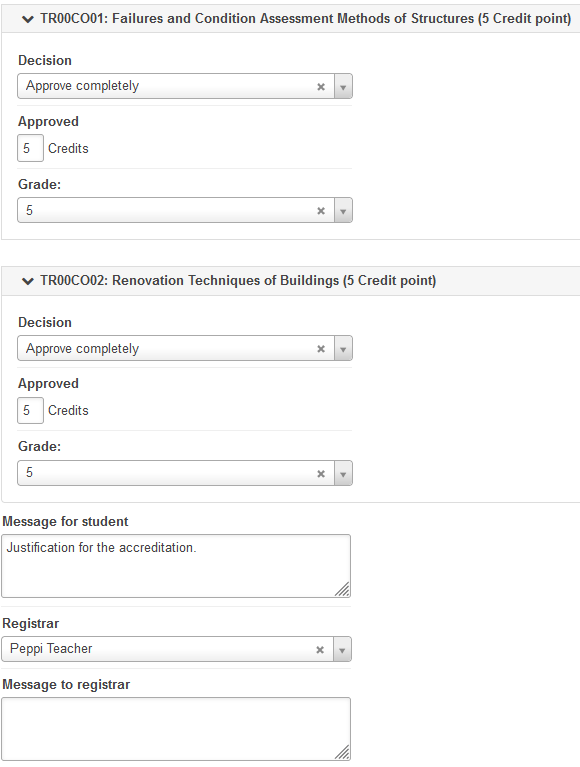
Figure 3. Recording information related to the decision
Instructions for marking credits
In the ‘Approved’ field, you can enter any scope, even less than what the course to be substituted amounts to. If the decision is ‘Approve completely’, Peppi will not complain even if the scope is smaller than what the student entered for the course.
Instructions for marking the grade
In the Grade field, enter the grade (1-5) that the student has received for the course for which he/she is applying for accreditation. If the evaluation is “passed”, select H (passed) in the field.
Studies completed abroad are marked with a grade on a scale of 1–5 if the grading scale was the same. If the scale was not to the same, the letter H is used.
If it is a case of the competence inclusion, enter H (passed) as the evaluation.
Finally, click ‘Save’.
Decision: Reject
In inclusion processing, you cannot make a ‘Reject’ decision for individual components. Instead, you must reject the entire application. You can do this by clicking the ‘Reject the application‘ button at the top of the application page.
Choosing the application keywords
In the ‘Hakemuksen asiasanat‘ window, select the keywords that best describe the competence in the application (Figure 4). Note: The window is only in Finnish. You can select more than one keyword. You can also filter the keyword list by first typing your field of study in the ‘Ohjauksen ala’ field to see only the keywords related to your field. Note: In this case, you cannot find so-called general keywords. Keywords gather applications in an accreditation bank, where you can search for accreditations already made using keywords.
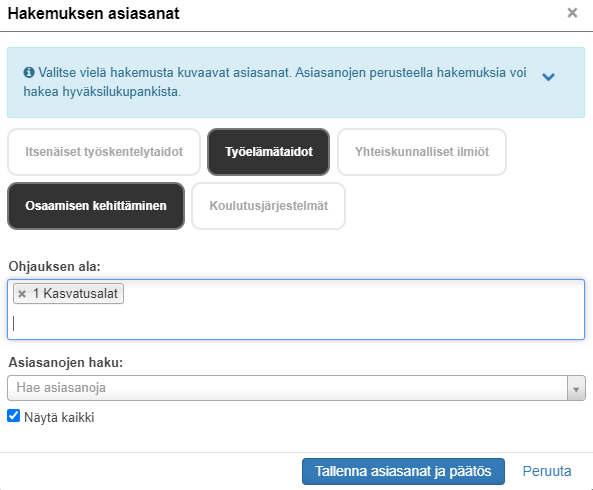
Figure 4. Adding keyword to the application
Click ‘Tallenna asiasanat ja päätös’ to move forward. Now you only have to record the accreditation.
Partial accreditation of the application
Partial accreditation requires an agreement to be drawn up. If you select the option in question for one of the courses in the study module, an agreement must be drawn up regarding the course (Figure 5). If necessary, a separate agreement can be made for each course (Figure 6).
- Create the agreement on the Agreements tab of the processing of the application before the decision is made.
- Select the course requiring the agreement from the Select the course/competence to be included menu.
- Enter what the student must do to have the entire course approved in the ‘Description of new agreement’ field.
- Click ‘Add new agreement’. Check the information on the agreement. In this section, you can, for example, share the information on the agreement with another teacher by adding them in the ‘Other teachers’ field.
- Click ‘Save’ to approve the agreement.
Then continue processing the application on the ‘Process’ tab.
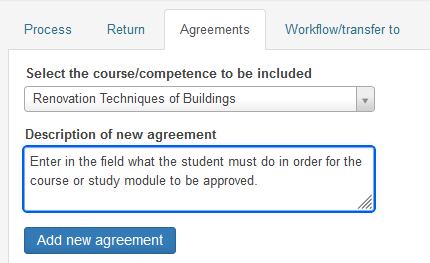
Figure 5. Drafting of the agreement in accreditation
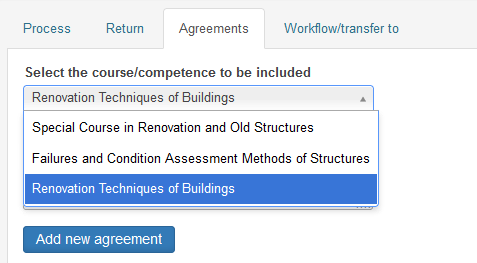
Figure 6. Selecting a course on the Agreements tab
Click ‘Go Directly to Decision-Making’ on the ‘Process’ tab.
Select ‘Decision’ for the application ‘Partially approved’, write a message to the student, mark the accepted credits and the assessment of a previous course, select the registrar (yourself), and click ‘Save’.
Please note that you will now only record as credits the part of the scope of the course that is accepted in the accreditation.
You still need to add the keywords of the application (instructions on this page).
After this, you go to the registration of the accreditation in Peppi.