Reservation listing and mass management
In this view, you can retrieve reservations to the list with different search criteria and edit multiple reservations at the same time. Go to Resource planning and reservations section and choose Reservation listing and mass management.
The most typical example is to publish reservations en masse, following which the reservations will also be displayed to the students (publishing of course timetables).
Note! Some of the buttons in the picture are only displayed to users with the planner role and to administrators!
To search for reservations:
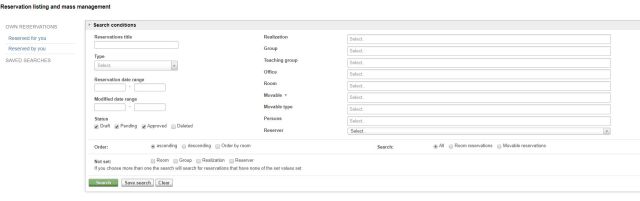
Specify the search criteria as desired, and then click the green Search button to start the search. You can choose which columns are shown in the results when you click Columns button.
To search for reservations, do one of the following:
a. Use the quick search features on the left-hand side (Own reservations or Saved search).
b. Choose the search criteria from the right-hand side menu.
- Set time range to search reservations
- You can limit results and choose reserver, room, group, building, implementation or topic. You can add multiple values to fields but only one reserver.
1 Carrying out and saving mass edits
In the front page view, define the search criteria and search for the reservations. You can choose which columns are shown in the results when you click Columns button.
1.1 Saving mass searches
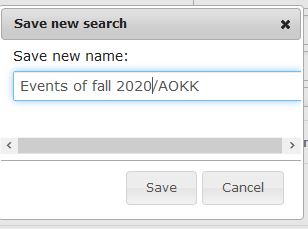
When you have made search, click Save search button. Write the name of search in the opening window.
If you want to regroup searches create group this way: Write first the group name add / sign and then write the name of the search. For example Events of fall 2020 / AOKK.
Now group Events of fall 2020 is created and in that group is search called AOKK.
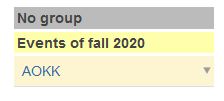
If you want to add new search to the group just put the name of the group first.
1.2 Carrying out mass edits
- Click the checkmark in front of the row to select the instances you want to change, or click the checkmark in front of the word Weekday to select all.
- Check how many results the search gives and how many rows is seen in the page. Results might be divided to multiple pages. You can choose how many rows you can see in the page so you can then choose all the reservations for mass editing at once.
- Then select whether you want to change the status of the reservations or edit them.
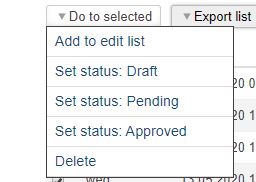
- If you select ‘Add to edit list’, a blue bar appears above. Click the ‘Do bulk edit’ button displayed in the bar.

- The selected/recurring instances are listed at the top of the page, and new information can be specified at the bottom of the page.
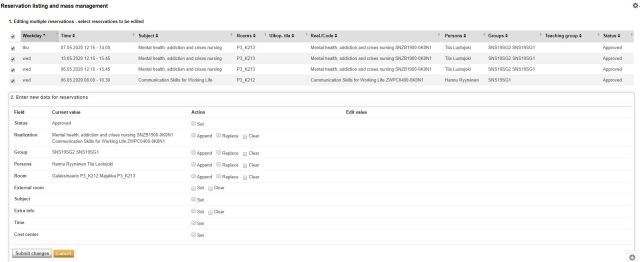
- Add a checkmark to an Action column to edit the information concerned. Change the data as applicable.
- Status – are the reservations in the suggestion, draft or published status.
- Realization – you can define the implementation the reservations are made for. The ‘Realization’ feature is not used for event reservations.
- Append menu – you can add another implementation for the reservation.
- Replace menu – in the reservations you selected, you can replace an implementation with another implementation.
- Clear menu – you can delete an implementation from the reservations you chose.
- Group – you can define the groups the reservations are made for. Groups are not used in event reservations.
- Add menu – you can add groups to the reservations you chose.
- Replace menu – in the reservations you selected, you can replace group(s) with other group(s).
- Clear menu – you can delete a group from the reservations you chose.
- Persons – you can define the persons the reservations are made for. In teaching reservations, select the teacher of the implementation concerned. In other reservations, select the person in charge of the reservation.
- Add menu – you can add persons to the reservations you chose.
- Replace menu – in the reservations you selected, you can replace person(s) with other person(s).
- Clear menu – you can delete a person from the reservations you chose.
- Room – you can determine rooms for the selected reservations.
- Add menu – you can add room(s) to the reservations you chose.
- Replace menu – in the reservations you selected, you can replace room(s) with other rooms.
- Clear menu – you can delete room(s) from the reservations you chose.
- External room
- Set menu – you can set an external room for the reservations you chose.
- Clear menu – you can delete an external room from the reservations you chose.
- Subject – you can set a subject for the reservations you chose. Subject means the name of the reservation. This is used in reservations other than teaching reservations.
- Extra info – you can add additional information to the reservations you selected or clear the information you have already added.
- Time – you can edit the time of the reservations you chose. The date cannot be edited here.
- Cost center – you can edit the cost centre of the reservations you chose.
- Click the Submit changes button to accept and save the changes.
- The top part of the page displays confirmation for the saving of new information, and the changed information is displayed in the list.
2 Examples of using mass edit
2.1 Case: Changing the status of multiple reservations
- Search for the reservations.
- Select the reservations you want.
- Under the Do to selected button, select the status you want.
To make changes in the table view:
- Search for the reservations.
- Select the reservations you want.
- In the blue bar, click the Edit in table view button. The table view opens in a new browser window.
Make the desired changes to the table cells. The data will be saved automatically.
- Click the + sign to add rooms, implementations, persons or groups. The search box activates in the top left section of the page.
- To delete the selected resources, tick the checkbox in front of each resource. The system asks you to confirm the deletion.
2.2 Case: Predefined list of own unpublished reservations
With this example, you can make a predefined list of the unpublished reservations you have saved in the system.
- In Peppi, click Resource planning and reservation’ then choose Reservation listing and mass management.
- Set the search criteria.
- Uncheck Status -> Published (because you only want to search for unpublished reservations)
- Set the end date far in the future, e.g. 1 January 2029.
- Leave the start date blank so that the saved search will always retrieve the current date in the field.
- In the Reserver field, retrieve your own name.
- Click Search to get the results that meet the search criteria.
- Click Save search and enter e.g. ‘My unpublished reservations’ as the name of the search, and then click OK.
- The saved search will now always be displayed on the left-hand side of the Reservation listing and mass management menu, from which you can activate the search with a single click.