Management of students PLP
The student’s PLP contains buttons that are displayed on all tabs.

Select version of PLP
From the Select version of PLP dropdown menu, you can select the PLP version you want to view. The menu always displays at least an PLP in the draft status. A maximum of one approved PLP is displayed, with the previous versions shown in the deleted status.
Check button
Use the Check button to check that all the studies in the PLP has a grade assigned to them. In the pop-up window that appears, you can check whether all the studies included in the PLP have the mandatory study type and grade as well as the mandatory language phrases included in the study right selected for them. The pop-up window also shows whether the study unit has been assessed.
Comment on PLP button
This feature relates to the PLP approval process. A student may request comments on their PLP from the tutor, and the tutor may also comment on the PLP if applicable. The comments pertain to the ISP that is in the draft status. A new message chain will start when the PLP is approved.
- Select Comment on PLP.
- Fill out the fields.
- Select Send.
Approve PLP
This feature relates to the PLP approval process. A student may request approval of their PLP from the tutor.
- Select Approve PLP
- Fill out the fields
- Select Send
The approval of the PLP lock the current version that can no longer be edited by the student. PLP in the draft status is immediately created for the student after the PLP has been approved. Student is able to make changes to the new draft version of the PLP and is able to send it to be approved. If you can’t make changes to the PLP, make sure that you are editing the draft version of the PLP. PLPs can also be approved on the Students tab of PLP guidance.
Create task button
- Select Create task
- Fill out the required fields to create a task for the student whose PLP you were viewing.
- Select Send
You can also assign tasks on the Tasks tab of PLP guidance.
Structure filtering and symbols

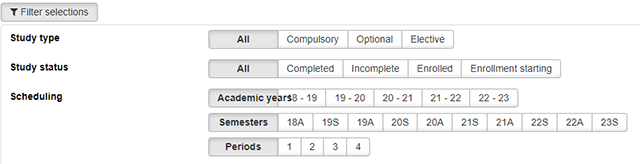
Filter selections
Study type: Select the filtering criterion according to the study type.
Study status: Select the filtering criterion according to the status of the study unit.
Scheduling: Select the filtering criterion according to the scheduling.
Opening and closing the study modules
To open or close the entire structure, click the Open all or Close all button at the top of the page.
To close an individual study module, click the down or side arrow in the left-hand side of the bar next to the module. This will open or close the structure for the study module concerned.
Explanations for the symbols used ? icon
Click the question mark above the PLP structure. The symbols used in the PLP are displayed.
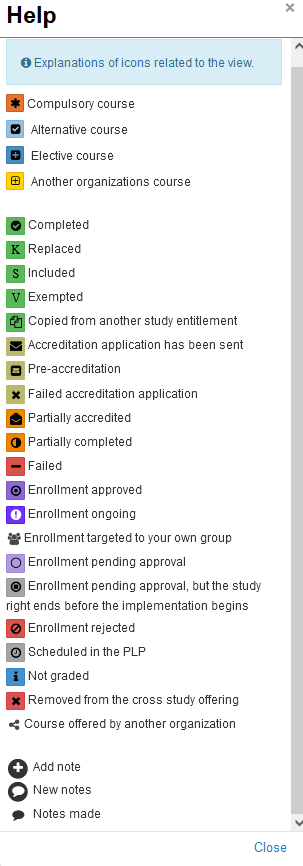
View the info box or hover the mouse over a symbol in the PLP structure for an explanation of what the status means.
Info boxes
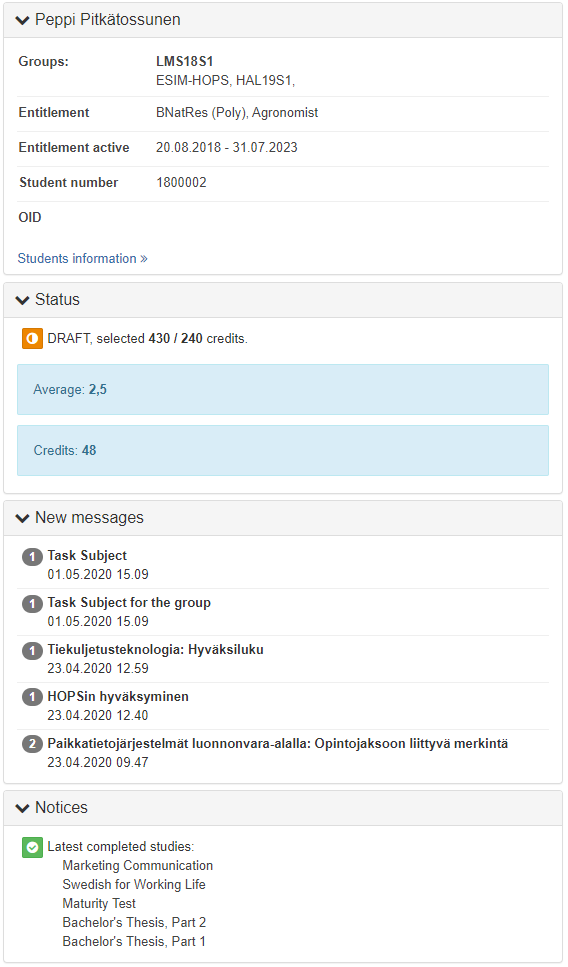
The information related to the student and the PLP can be found from the right-hand side of the PLP.
Student’s information
See the info box on the right-hand side to view the student’s basic information. The information displayed include the student’s groups, study entitlement type and validity period, student number and ID. Click the Students information link to view the student’s more detailed information.
PLP status
See the status box of the PLP for a summary of the situation and status of the student’s PLP.
New messages
The new messages related to the PLP are shown in the New messages box. This box is not displayed if no new messages have been received. Messages can also be viewed on the Messages tab.
Notices
The Notices box displays the most recent events of the PLP, such as enrolments and completed studies.