Searching study rights
You can use the study right search to search for one or several students based on your chosen search criteria. The available search tools include the quick search, basic search and advanced search. Searches can also be saved.
Study right search allows the use of * as a wildcard. In the surname field, for example, Aalto* will return all names starting with Aalto (Aalto, Aaltonen, Aaltojärvi, Meri-Aalto,…).
Quick search
The Study Management Desktop includes a quick search that can be used to search for students. This feature is only available on the Study Management Desktop.
To run a search, do the following:
- On the Study Management Desktop home page, select the Search students autofill field.
- Start typing a student’s name or number -> select the desired student from the list.
- Note that the student numbers transferred from Asio must be entered in their entirety, e.g. X1003.
- If you want to search for a graduated, resigned or suspended student, enter + (plus sign) before the name or number. The search returns a list of active and inactive students and their study rights.
Basic search and saving the search
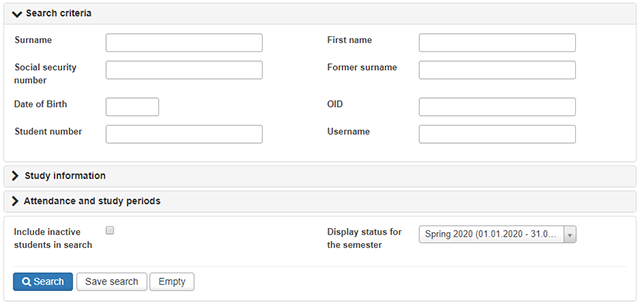
The study right search is found under the ‘Students’ menu in the desktop top navigation. You can use the search feature to search for students or study rights using the students’ basic information, study information and attendance and study period information, etc. as search criteria. If you also want to search for the information concerning graduated, resigned or suspended students, tick the Include inactive students in search box.
Basic search and saving the search:
- In the top navigation, click Students -> Students or Student administration.
- Enter the desired search criterion or criteria. The search criteria are grouped under search criteria related to person, study information, and attendance and study period information.
- Select Search.
- The search result is displayed under the search criteria.
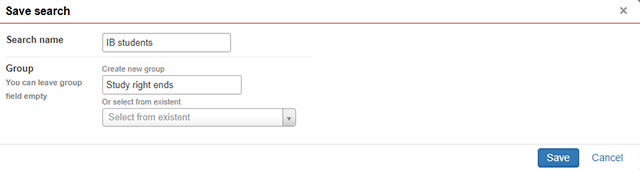
- To save the search you made, click Save search.
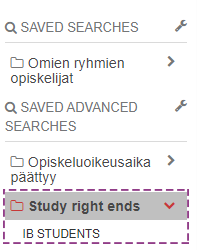
- The saved search can be found in the left navigation under Saved searches.
Advanced search and saving the search
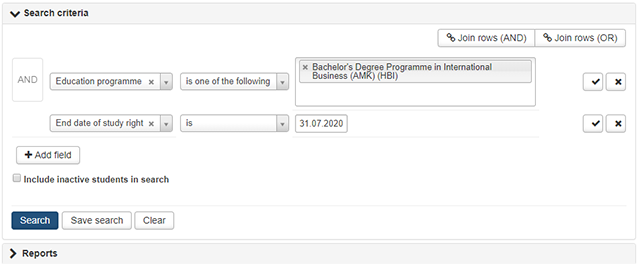
You can combine the desired searches into a single search using advanced search. In other words, you can search for all part-time students who pursue studies in the education or degree programme in business administration and whose study right ends on 31 July. If you also want to include graduated or resigned students in the search results, tick the Include inactive students in search box.
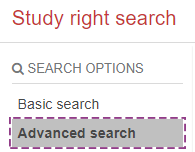
- From the left-hand side navigation, select Advanced search.
- Select Add field.
- Select the filtering type and filter selection and, if applicable, any additional information related to the filtering type.
- Apply the desired number of filters.
- To delete a row, click the x icon on the right-hand side.
- If applicable, you can combine search criteria. For example, you can create a search that retrieves all students who study in the Degree Programme in Business Administration and whose study right expires on 31 December OR 31 July.
- Click the v icon on the right-hand side of the row.
- To combine the search criteria, click Join rows (AND) or Join rows (OR).
- Select Search.
- To save the search you made, click Save search.
- The saved search can be found in the left navigation under Saved advanced searches
Editing and deleting saved searches
To delete saved searches, click the spanner icon found on the right-hand side of the saved searches or saved advanced searches menu item.
You can also use this menu to change the group or edit the name of the search.
To delete a saved search, change its group and edit its name:
- In the left-hand side navigation, select the spanner icon on the right-hand side of the saved searches or saved advanced searches menu item.
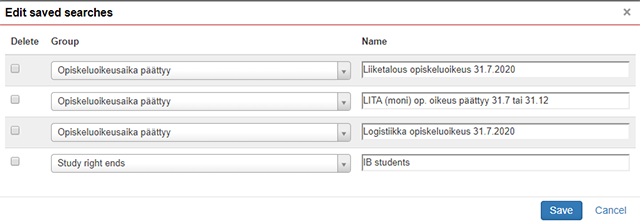
- Peppi displays a window where you can delete a search, change its group or edit its name:
- To delete a saved search, tick the Delete box and click the Save button.
- To change the groups of a saved search to another existing group, select the group from the drop-down menu. The existing group must be under the same search (saved searches or advanced searches). Then click the Save button.
- To change the name of a saved search, type the new name in the Name field. Then click the Save button.

Updating and copying a saved search
You can update or copy saved searches as a template for a new search. To update and copy searches, select the search concerned and edit the search criteria. After editing the search criteria, you can save the search replacing the existing search, or as a new search, in which case the previous search remains available as well.
- From the left-hand side navigation, select the desired saved search. The saved search opens on the page.
- You can then update the search criteria.
- When you have updated the search criteria, click the Save search button.
- To update an existing search: Save the updated search with the same name and in the same group as the original search.
- If you want to copy the existing search as a new search (and leave the existing search available for selection): Save the search with a different name and/or in a different group.
- If you select an existing group and enter a new group name, the search will be saved in both.
- Your search has now been updated with the new search criteria or as a new search.
Sharing saved basic and advanced searches to another user
You can share saved searches to another user.
- Press Share Searches -button from the left side of the page.
- Search searches that you want to share using searches field. You can share multiple searches at the same time.
- Search person, you wish to share your search to by using Persons field.
- Press Share button.