Selecting studies tab
Use the Selecting studies tab to add studies to or delete studies from the desired study modules. Using the study search feature, you can search for several study units or courses and add them to the PLP in one go. Before adding courses in the PLP, you can compare them using the Compare courses feature.
Viewing the content of a study module
Click the name of the study module -> a pop-up window appears showing the details of the module. Press the Esc key or click the small cross button in the pop-up window or the Close button to close the pop-up window.
Viewing the content of a study unit
Click the name of the study unit -> a pop-up window appears showing the details of the unit.
Press the Esc key or click the small cross button in the pop-up window or the Close button to close the pop-up window.
View curriculum
- Select View Curriculum
- The curriculum used as the basis of the student’s PLP opens in a separate pop-up window.
Searching for, adding and comparing studies
A student or staff member may add study units using the search feature or add personal study units. If a button is not displayed, you do not have sufficient user rights to use the feature.

Search for studies
- Select the Selecting studies tab.
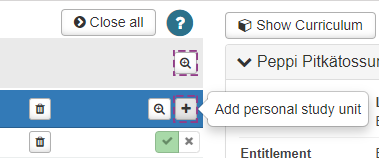
- Click the magnifying glass icon after the name of the study module -> the service will direct you to the Search for studies functionality.
- Search for studies by name or code
- Search for studies using the text field -> Click Search.
Limit the search set by selecting the desired criteria from the left-hand side column under Type of the course, Type of education, Education, Optional, Degree title or Compulsoriness. - The view displays the study units or study modules that meet the search criteria you selected.
- Click the double arrow icon at the top of the view to switch to the next page. You can also change the number of search results shown on the page by selecting the desired amount from the drop-down menu.
- To view a specific study unit or module, click its name.
- Search for studies using the text field -> Click Search.
- Click Add to basket at the end of the row to select the desired studies to the search basket.
- To view the contents of the search basket, click the x studies selected link.
- Click Empty basket to clear the basket.
- Click the x symbol before the study unit to delete it from the basket.
- Click Add selected to PLP to add the selected studies to the PLP.
Adding a personal study unit
Use this feature to add studies that are planned to be completed for example in CampusOnline, as part of student exchange abroad or that have been previously completed in another higher education institute.
- Click the plus symbol on the Selecting studies tab to add the study unit to the desired study module.
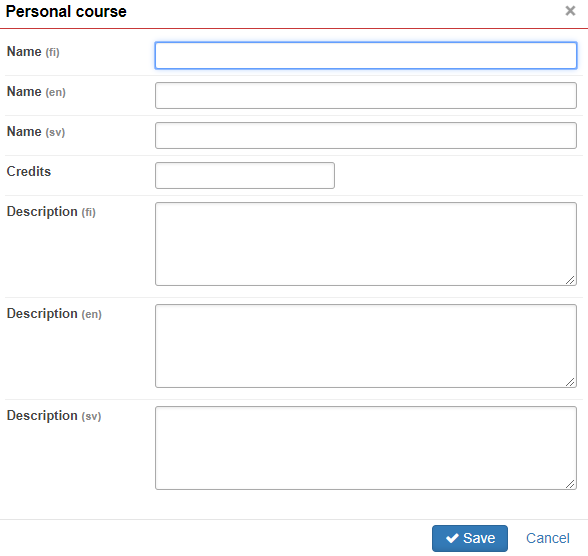
- In the Name (fi) field, enter the name of the study unit or course in Finnish.
- In the Name (en) field, enter the name of the study unit or course in English.
- In the Credits field, enter the scope of the study unit or course in credits.
- In the Description (fi) field, enter the description of the study unit or course in Finnish.
- In the Description (en) field, enter the description of the study unit or course in English.
- Click Save.
- A personal study unit or course is evaluated in the Evaluation window.

Compare courses
You can compare a maximum of five (5) study units or courses at the same time. You can select alternative or elective studies for the comparison.
- Select the Selecting studies tab.
- Click Add to comparison to add courses or study units to comparison.
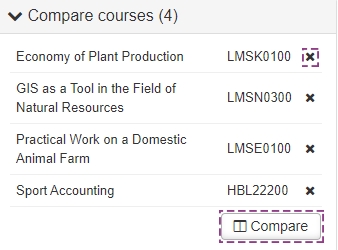
- Click the X button in the Compare courses summary box to delete courses from the comparison.
- In the Compare courses summary box that appears on the right-hand side column, click Compare.
- Click Delete selection to delete a course from the PLP.
- Click Select in the comparison to add a course to the PLP.


Deleting studies from the PLP
Study units or courses can be selected to be deleted from the PLP either one by one or several study units at the same time. Only a staff member with a proper authorisation to do so may permanently delete a course. The courses marked to be deleted will no longer be shown on the other PLP tabs.
Deleting a course
The deletion of a course is a two-step process. In the first step, the course is marked to be deleted, and it will no longer be shown in the student’s PLP. This step can be completed by a student or staff member. In the second step, the course will be permanently deleted. The second step can only be completed by a staff member with a proper authorisation to do so.
First step:
- Click the x button at the end of a course row to mark it for deletion.
- Courses that have been marked as compulsory cannot be deleted.
- A student can use this procedure to e.g. indicate that they do not intend to complete an alternative course.
- A course that has been marked to be deleted will no longer be shown on the other PLP tabs.

Second step:
- The permanent deletion of the course is carried out by a staff member.
- The staff member deletes the course permanently by clicking the recycle bin button.
- If the course has already been graded, it will not be deleted from the student but moves to external studies in the PLP.

Deleting several courses or editing their optionality
You can edit the optionality of several courses or delete several courses in one go.
- Tick the checkbox at the beginning of the row to select the desired courses.
- Click the Edit selected button at the top of the page.
- If you want to edit the optionality of the selected courses, click Edit optionality of the selection.
- You can change the compulsoriness codes of the courses from the drop-down menu.
- To delete the selected courses, click Delete selected and confirm the deletion.

The Edit selected button can be found at the top of the page.

When you edit the optionality of the selected courses, you have the following options available in the drop-down menu:
