eRPL application in Peppi
The teacher is responsible for making sure that the credits and grade are entered correctly on the student’s PLP and the transcript of records.
You can find all the eRPL applications students address to you in Peppi on the teacher’s desktop in the eRPL Accreditation drop-down menu. New RPL applications addressed to you will automatically cause an email to be sent to you by the system.
If you receive email notifications about applications that you believe have already been processed, please check that the application status is "archived" (figure 1). If the status is not "archived", complete the processing of the application by either performing credit transfer or marking the application as handled. For more detailed instructions, please refer to the application processing instructions.

The application window
On the first tab, you find the applications for which you must carry out accreditation processing. The processed applications are transferred to the next tab. There are separate tabs for pre-accreditation applications.
The status of an eRPL application sent to you by a student may be one of the following: new application, currently processed or already processed. The status changes as the processing progresses (figure 2).

The parts of the application
Open the application from the ‘Actions’ drop-down menu on the right side of the application line. Select ‘Process’.
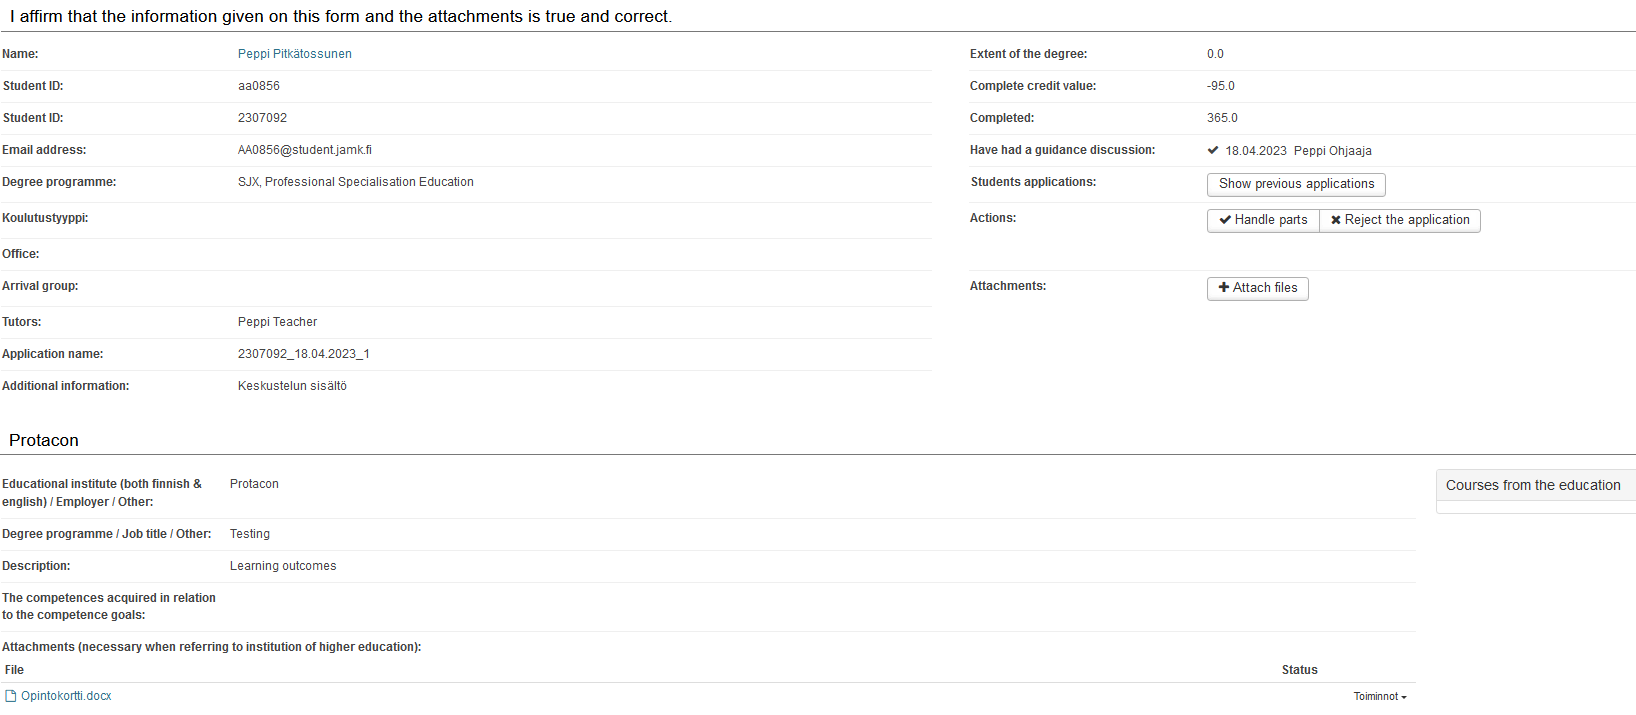
The application is divided into three parts. In the upper part are the student’s information, in the middle the place of performance details and at the bottom the studies or competence with which the student is applying for accreditation. Note the attached file (figure 3).

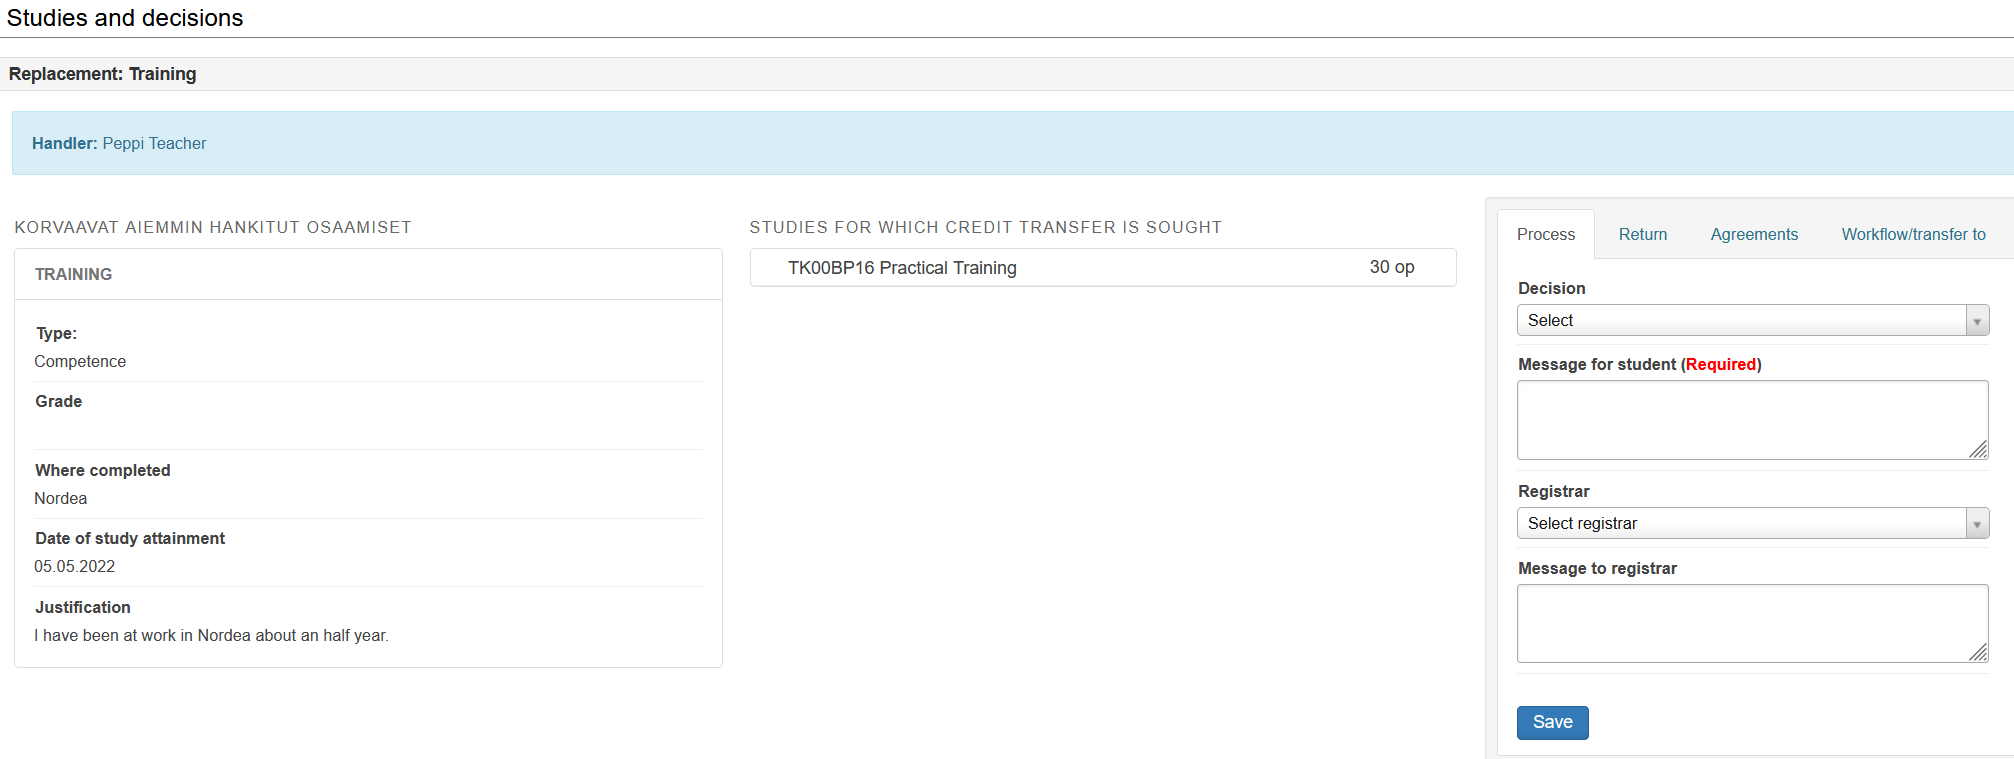
The tools you use when processing the accreditation can be found on the right side of the Studies and decisions section (figure 4). You can find application processing instructions on the pages of replacement, inclusion and prior acquired other competence.
Under ‘Studies and Decisions’, you can also see the type of accreditation in addition to the actual study or competence.

If another person has transferred or returned the application to you for processing, the messages others have written on the application are displayed above the accreditation tools. These messages are also sent to your email.
At the bottom of the main window, you can find the change history of the application.
Returning or transferring the application
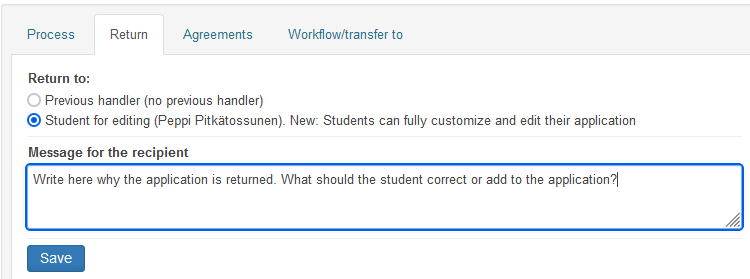
If it seems that the student should still complete or correct their application, send it back from the ‘Return’ tab (figure 5). Select ‘Student for editing’ and enter what you expect the student to do with the application in the Message field. Finally, click ‘Save’.

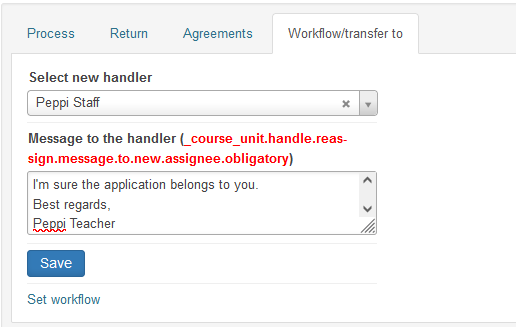
You can transfer the application to another person for processing if you are not responsible for processing the application. Do this from the Workflow/transfer to -tab (figure 6). In the ‘Select new handler’ drop-down menu, type the person to whom you want to transfer the application and write a message to them. Click ‘Save’.
